Search This Blog

Friday, April 16, 2021

How to Self-Publish Your Family History Book

Re-print from FamilyTree.com

By Maureen A. Taylor Premium
Share to Pinterest
Open book.

From shows on the DIY Network to crafty pins on Pinterest, the do-it-yourself culture is thriving. With a little inspiration, determination and instruction, you can DIY a garden walkway, a feature wall out of old wooden pallets or a no-sew shopping tote from an old t-shirt. “But what I really want to DIY,” we can hear you thinking, “is my family history book.” Well, guess what? You can DIY that, too.

You may have thought an actual print book in which your relatives can read your family’s story and see photos would be out of reach. But with modern printers, desktop publishing software, online book services and entire self-publishing companies, the dream many family historians share—to see their genealogy work in print—is achievable.

And just like a home improvement project, you can DIY it all, or you can focus on the parts of family history publishing you feel comfortable with (say, the writing) and outsource the rest. Whether your needs and budget call for a simple bound collection of written family memories, a narrated photo book or an heirloom-quality hardback, this DIY guide will see you through.

DIY Publishing Options

The technological advances that let you find digitized records and track your family tree online have opened up new options for self-publishing your family’s story. The processes and end products vary for each of the following options and, as you might expect, so does the cost:

Photocopied booklet

Using a word processing program, you can pull together a narrative family history, drop in images and a family tree generated from your genealogy software, and add footnotes or end notes. Print it on your color printer, staple it or put it into a presentation binder, and call it a day. If you want multiple copies, email the file to your local copy shop or take it in on a flash drive, which will result in better images than photocopying your printouts. A copy shop also can provide card stock for a cover and even bind your book with saddle stitching (pages are stapled down the middle and folded), a spiral (like a notebook) or a perfect binding (resembles a paperback book) with a printed spine.

The more you spend on binding, the more durable your book will be. Wire spirals damage the pages each time someone turns them. A relatively short-lived booklet might be fine for your purposes, but be prepared to spend more on a sturdier binding if you want the book to last for a while. Going to a copy shop is simple and quick, but it may not be the most cost-effective option. Black and white copies generally start around 10 cents each, but the charges quickly add up for color printing, better-quality paper, two-sided pages and binding. You’ll usually get discounts for multiple copies of the same booklet. Get quotes from several shops—prices can vary greatly.

Photo book

Do you want to recount your family history in something more like a traditional book? A photo-book service offers a customizable layout, high-quality paper, attractive templates in a range of colors and themes, and a gorgeous cover. You start by picking a template, which comes with a selection of backgrounds and page layouts; then upload photos as JPG files; and add narrative (it’s a good idea to finalize the text in a word processing document before starting your book).

Because text boxes may be limited in size, this option is ideal when you want to let photos and document images tell the story, helped along with explanatory captions. Prices depend on the service and the size of book you choose. For example, on Shutterfly, hardcover books range from 8×8 to 11×14 inches. Prices are based on the first 20 pages, with a per-page cost for a longer book. The expense is a downside to this option, though frequent sales (especially around holidays) help mitigate the cost. These services save your book once you create it, so you can purchase a copy and let family members order their own. Another downside is the lack of templates for genealogy-friendly design elements such as timelines and family tree charts. You could use your software to generate a tree, convert it to a JPG file and add it to the book as you would a photo.

Print-on-demand (POD)

Never before have so many aspiring authors in all fields of study published their work. POD self-publishing sites like Lulu and Blurb let you create a book on your computer and upload it as a PDF file for printing. You set the sale price and order copies as needed, or send a link to cousins so they can purchase their own copies. The POD printer gets a percentage of your sales. You even can sell your book commercially. In that case, the book will be available through Amazon, which also gets a cut: A $14.95 Lulu book purchased on Amazon nets the author $1.58, but the same book purchased straight from Lulu nets the author close to $8.

You’ll need to format your book in a document according to the POD site’s specifications for file type, image resolution, margin size, etc., and create a cover. Most sites provide helpful instructions and templates, and some will do this work for you for a fee. You may be able to add on services such as obtaining an ISBN, necessary if you want to sell your book commercially. Blurb offers online software you can use to create your book, though it has a steep learning curve, says Nancy Barnes, owner of author services company Stories to Tell Books.

She recommends this option for skilled computer users. The cost of actually printing the book varies based on size, style, cover type, bindings and paper. You also may be able to choose an e-book. Your sale price should account for the site’s percentage and any profit you want. Find Lulu’s pricing calculator and Blurb’s pricing calculator. POD costs more than working directly with a printer (our next option) that offers volume discounts, but POD means you don’t have to buy a lot of books up front that may end up collecting dust in your attic.

Publisher-for-hire

When you work directly with a book printer, whether online or in your local area, there’s no continuing arrangement between you and the printer, as with POD. Instead, you supply the files for your book, order a minimum number of copies, and the print service prints them. Ask about volume discounts, though you may need to buy 100 or more books for a significant price break. If you have a large family and everyone wants a copy, working with a printer may be your most cost-effective option. Printers require you to submit fully prepared files, usually PDFs, that meet their specifications. You may need to submit image files separately as well as embedded into your PDFs.

Most publishers offer more personalized guidance and add-on services than a POD site would. Self-publishers such as Genealogy House can help with writing, editing, graphic design and other aspects of the publishing process—great if you have a long, complex book combining text and images. These are best laid out with graphic design software such as Adobe InDesign. Especially if you plan to sell your book, you should seriously consider professional editing and design services.

eBook

Digital books are increasingly popular choices for self-publishing. A wide range of file formats are proprietary to different e-reader devices, such as Kindle and Nook, but if you stick to a simple PDF, people can read your book on a desktop computer or on any device that will open a PDF. And it’s easy to create your book in a Word document and save it as PDF. Try to see how your book looks on popular devices. You may need to tweak the layout to make sure page breaks and pictures fall in the right places.

The big benefit to an ebook is avoiding the costs and decision-making of printing, but remember that not all of your intended audience uses e-readers. Many won’t place the same value on a PDF file as on a printed book. The longevity of ebook files will likely change as technology develops, but that printed book on your shelf will be able to be held by your descendant’s generations from now. If you’re trying to produce a family history that stands the test of time, print your book. Or offer the best of both: If you use Lulu or Blurb, relatives can choose to order a print book or an ebook.
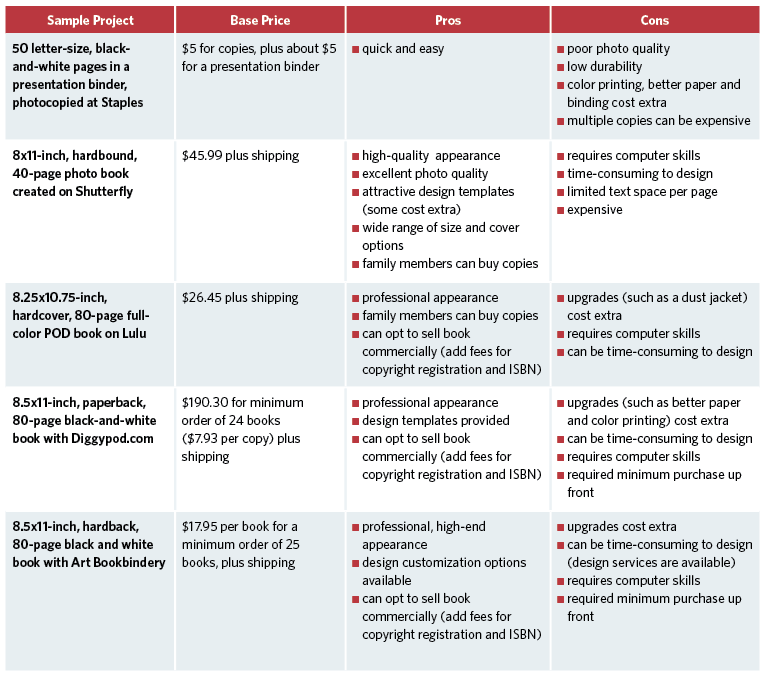
Comparison chart for publishing options.
This table makes it easy to compare some different family history book options.

Assembling Your Book

Go ahead and start writing, but when you set up your book file with images and footnotes, you’ll want to have a plan for the self-publishing option you’ll use, the type of binding, the size of your book, etc. “Many people ask if there’s a template for such a book,” Barnes says. “But each family history is so unique and the information takes different shapes and uses a different organizational plan.” Start by browsing the family history section at a genealogical library and noting what you do and don’t like about those books. At genealogical society meetings and on Facebook, talk to fellow researchers who’ve undertaken such projects. And ask yourself these questions:

  • What’s your budget for this endeavor? Will family members be interested enough to purchase copies?
  • What type of end product do you want? A hardback, full-color, high-end book? A paperback novel? Or will black-and-white photocopies do?
  • How much time can you spend on it?
  • How comfortable are you with word processing and desktop publishing software?
  • Who’s your intended audience?
  • How long will your book be?
  • Do you have a lot of photos and/or record images you want to include?
  • How many copies of the book will you need?
  • Do you intend to sell the book for profit, give copies as gifts, or make it available for purchase only to relatives?

Once you have a clear vision for your family history book project, think about these important elements:

Writing the Story

The length and type of your book goes hand in hand with the option you choose. Writers think in terms of word count. Use the word count feature in your word processing software to find out how many words your manuscript holds. The 6×9-inch book you’re envisioning typically has 300 words per page, so your 24,000-word manuscript will need 80 pages, plus more for photos. A photo book with captions requires fewer words than a full-length narrative.

You’ll want to have a fresh eye on your book before you submit it for printing. A friend who’s good with grammar will do for a book that’s just for family, but hire a professional editor if you want to sell your book. Even the most seasoned authors utilize copy editors to proofread their work and double-check grammar and spelling. Making sure your text is in its final form also will save you money: You pay for every change you make after submitting your book to the printer.

It’s also important to include the sources of your family history information. That’s where it helps to cite sources all along—you won’t have to try to figure out where you found that census record five years ago. Whether to include formal citations or to simply provide source information is up to you and will depend on your intended audience. You can include citations/source information in numbered footnotes (at the bottom of the page) or end notes (at the end of the book).

https://www.familytreemagazine.com/storytelling/6-tips-writing-family-history/

Selecting the Images

If you have a lot of photos and record images to include, you’ll want a book with high-quality paper and color printing so the images will reproduce well. As you write your draft, note in your document which images you plan to use. Make sure you have permission to use the pictures in a published work. If they’re from your family collection, you probably do, unless a professional photographer took the photo after 1922. Otherwise, you’ll need to obtain permission from the copyright holder or the owner of the image, or figure out whether it’s in the public domain (this chart can help). That could take some time, so weigh how important each photo is to your project. Image quality is important: If photo resolution is too low, the image will look pixelated in print. Barnes recommends using high-resolution files (usually JPG or TIFF), of at least 300 dpi (dots per inch) or 1000×1000 pixels.

Tip: Not enough ancestor photos for your book? You can illustrate your family’s story with maps, record images, historical photos of ancestral communities and pictures of gravestones, heirlooms and family homes.
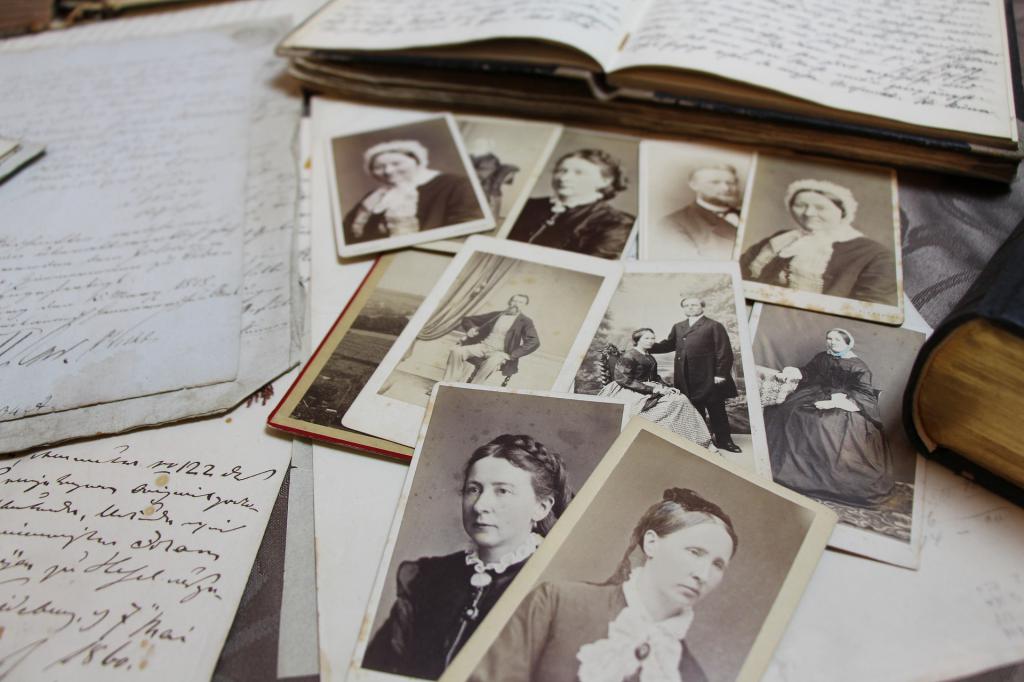
Table with antique photos and handwritten documents.

Choosing the Cover

An attractive cover will entice generations of your family to open the book. A simple cover with an ancestor portrait and a title is best. If your book will be just for family, you can use a site such as Canva, which offers design templates you can use, or ask your graphic design student niece. If you plan to sell your book or you just want a polished look, consider hiring a graphic designer for the book cover and interior. It’ll be worth the extra expense.

Preserve and Project Your Project

Any written work is copyrighted whether or not it bears a copyright statement, but you can remind others it’s copyrighted and identify yourself as the copyright holder with a statement on the back of your title page. For example, “Copyright 2015 Joe Smith. Not to be reprinted without permission.” You also might include your contact information in case someone wants to reuse a part of your work.

Registering your self-published book with the US Copyright Office creates a public record of your authorship, a big benefit if you have to pursue a copyright infringement in court. The simple process involves filling out a form and paying a $35 fee. You’ll receive a certificate legally declaring you the copyright holder for your work.

If you’re writing a book you plan to sell, you’ll want an ISBN (International Standard Book Number), a unique commercial identifier. Your publisher or POD service can supply one, although this locks you into keeping your book with that company. And when you purchase your own ISBN for about $125 through an agency called Bowker, you can come up with your own publishing company name.

Once you have an ISBN, you’ll need yet another number, an LCCN (Library of Congress Control Number), if you want to add your book to the Library of Congress. A POD publisher can’t do this for you. Follow these instructions. There’s no fee, but you must order the LCCN before your book is published, and once it’s published, you have to send a copy to the Library of Congress. The ISBN and LCCN must appear on your book’s copyright page. In the end, you’ll be proud that you took steps to preserve and present your family history.

A version of this article appeared in the September 2015 issue of Family Tree Magazine.

Thursday, April 15, 2021

16 Genealogy Hacks That Will Save You Time And Money

 A reprint from Familytree.com

By David A. Fryxell
Share to Pinterest

Our favorite online genealogy hacks make websites do things you didn’t know they could do, speed up your research, and even combine the capabilities of multiple websites and tech tools. Some hacks can also save you money on subscription websites, by helping you ferret out free records or pay for them as you go.

Here we share some of the best online genealogy hacks to try.

1. See what’s new at your favorite genealogy websites.

It’s good to repeat searches on your favorite genealogy websites. But rather than slog through the same matches you’ve already seen, you can easily check out the latest additions at these sites:

  • Ancestry.com: Bookmark this page to see just-added content and what’s coming soon. (Note the dropdown menu set to United States; use it to view new content for other countries.) To have Ancestry.com automatically email you about new databases added to the site, opt in to New Records Notifications.
  • FamilySearch: On the same page where you can browse all collections, click Last Updated to list them by the most recently updated.
  • Findmypast: This UK-focused site at makes it easy to see new content. Just click Help & More>What’s New on the main menu bar.
  • Fold3: Subscription site Fold3 focuses on US military records. You can view its collections sorted by recently updated.

2. Find free databases on Ancestry.com.

Ancestry.com has more than 1,800 databases that are free to search even without a paid subscription. Many of these collections were created or indexed in partnership with other organizations, such as FamilySearch, and Ancestry.com has agreed to keep access to them free.

If you’re not a subscriber, you’ll need to create a free Ancestry.com account to access them. This account also lets you build online family trees, preserve and share photos and stories, connect with other researchers and read how-to help.

To see a list of free databases, search the card catalog for the keyword free (you can also combine this with other words, such as Ohio or war, to see what’s free in your area of research). Or you can search all the free databases at once. Scroll down on this page to see the full list. Collections include selected censuses for the United States, United Kingdom and Australia, as well as more obscure topics such as Alabama convicts and passengers on the sunken ship Mefkure.

3. Find free and a la carte records on Findmypast. 

Ancestry.com isn’t the only subscription website with freebies. By registering for a guest membership at Findmypast, you can unlock 850 million records—US censuses, US and Canadian public records, family trees and 10 million Irish Catholic parish records—without paying a cent. Don’t forget to check out the freebies!

If the records you want at Findmypast aren’t free but you don’t care to commit to a subscription, you can buy “credits” to pay for individual records. Check out your options on their webpage, which start at 100 credits for $14.95. (Scroll down to the “Prefer to pay as you go?” header.) Credits are valid for 90 days, and records cost between 5 and 60 credits to view. Once purchased, records can be viewed unlimited times.

4. Search GenealogyBank for all newspapers published in a city. 

Don’t limit yourself to the biggest newspaper in your ancestors’ hometown when searching subscription site GenealogyBank. Newspapers have come and gone, and the site’s collection often includes lesser-known publications you might never have thought to search. (Conversely, searching the entire site when you’re really interested in hits only from one place can flood you with useless results.)

To view all the newspapers from a single city and search them at once, click Browse>Newspapers by State. Click a state, then a city to search all the applicable titles. In Birmingham, Ala., for example, you can search the Age-Herald, Courier, Labor Advocate and Wide-Awake all at once.If you’re using America’s GenealogyBank, the institutional version available through many libraries, click View Title List in the Historical Newspapers paragraph and that will take you to the same list of states.

5. Search GenealogyBank for only recently added records.

If you’re a regular user of GenealogyBank’s newspaper collection, you might not want to search all billion-plus articles every time you return to the site. Fortunately, GenealogyBank makes it easy to limit your searches to records added in the past few months. On the main Newspaper Archives page, as well as on individual state, city and periodical search pages, click under the Added Since dropdown menu to select a date range of new content to view. You can also view a list of all new content online.

6. Add your DNA profile to MyHeritage or Geni.

You can now privately incorporate your autosomal DNA results into your MyHeritage family trees. First, download your raw DNA from 23andMe, AncestryDNA or Family Tree DNA’s Family Finder test. Then click the orange Upload button on your member profile page. A similar process works on Geni for those who’ve tested with Family Tree DNA: Just go to your Geni profile page and click Transfer Your DNA Results.

7. Map your family tree locations in MyHeritage.

Another new MyHeritage feature, PedigreeMap puts your ancestors on the map—literally. From the main menu bar at top, select PedigreeMap, and MyHeritage will automatically generate a world map of your online tree events. You can zoom in and out and select different trees to map.

8. Automate searching at your favorite site.

Once you’ve created at least one family tree at the following genealogy websites, why not let the ’bots do the searching for you? Each site offers hints for potentially matching records on its site. Even if you don’t subscribe to all these sites and can’t fully view matches, it’s worth keeping track of what records are out there. Here’s a breakdown:

  • Ancestry.com: Hints show up as leaf icons next to individuals in the tree view; click on each leaf to review and accept or reject hints. Or, on an ancestor’s profile page, click Hints to see them. See all recent hints by clicking on the leaf in the far upper right corner of any tree. The dropdown menu under See All Recent Hints In lets you choose a tree to work with. Manage hint preferences on their site preferences page and request weekly, monthly or no email alerts for new hints on this page (click Delivery Options).
  • FamilySearch: In the tree view, blue icons indicate available hints. Click the icon to view, and click in the resulting popup window to review the hint or jump to a page where you can view all this person’s hints and accept or dismiss them. FamilySearch also offers Research Suggestions. Click the purple icon to view these tips. You can view both hints and Research Suggestions on the right side of a person’s page.
  • Findmypast: Automated hinting is now available for just birth, marriage and death records (additional collections are pending). When you add a new person or amend a key piece of information in your family tree here, you may notice that a number within a circle appears on that profile, indicating the number of hints automatically found for that person. Clicking on the orange circle takes you to that ancestor’s hints page. Hints for birth and baptismal records are red; marriages, green; and deaths and burials, blue.
  • MyHeritage: The site automatically generates possible matches (called Smart Matches) in others’ trees; you’ll need a Premium or Premium Plus subscription to fully explore them. According to MyHeritage, its hinting technologies are about 97 to 98 percent accurate, based on user acceptance rates. View pending matches by clicking links on the left side of your MyHeritage home page.

9. Try some one-stop shopping.

A few genealogy sites have extended their reach by searching sites beyond their own collections. The best part? You don’t have to do anything extra to add these partner sites to your searches, as long as you’re doing a general search rather than focusing on a single collection or group of records.

MyHeritage automatically pulls in finds from its sister family tree website Geni, as well as BillionGraves, Tributes and FamilySearch. It also searches digitized newspapers at Chronicling America and the Australian site Trove. Ancestry.com scours the RootsWeb site it hosts, Find A Grave and more than 300 other “web indexes,” or copies of indexes that point to offsite content. The free FamilySearch hosts indexes to several collections that require connecting to subscription sites to view related images.

10. Get a quick view of Ancestry.com search results.

Once you’ve got some search hits on Ancestry.com, you can save time by not clicking through to review every possible result. Instead, hover your pointer over the blue, underlined collection title (such as “1940 United States Federal Census”). A window pops up showing all key data from that record, which you can use to decide whether this hit is worth investigating further.

If it is, click on the collection title or on the green See More box in that floating popup window to jump to a complete, printable extract page. You also can skip straight to the associated record image, if available, by clicking View Image below the collection title or on the thumbnail image on the floating window.

11. Print without paper. 

Of course, you want to save your finds from these popular genealogy sites, but you might not want bits of dead trees cluttering up your workspace. One simple way to “print” without paper—and to make your finds accessible on any device—is to use the free Evernote app. Once it’s installed, you can use the Evernote “clipper” to save a full screen or selection to your Evernote notebook, or just copy the record you want to save and paste it into Evernote.

You also can select Save PDF to Evernote from the PDF dropdown menu in the lower left corner of the Mac print box. In Windows, you’ll need a PDF printer installed; then you can “print” a PDF to a designated folder that Evernote automatically imports into a designated notebook. (Set this folder in Evernote under Tools>Import Folders.) For more about Evernote, see How to Use Evernote for Genealogy (Family Tree Books).

Even without Evernote, you can still use PDF “printing” in Mac or Windows to save digital copies of documents into whatever folder you choose. You can even organize these by ancestor or family group. Just remember to back up all your finds on the cloud or on separate storage media. Unlike paper, digital printouts can get lost when your computer crashes.

12. Search from within RootsMagic.

Users of the RootsMagic genealogy software program don’t even need to leave the program to search the web for ancestral info. According to Family Tree Magazine software guru Rick Crume, just select the individual you want to research and switch to the WebSearch tab (if Auto-search is checked). You can search for someone else on the same site by clicking the name in the sidebar.

To select which websites to search, click the little dropdown arrow to the right of the search button. If you want to add sites that the program doesn’t include (or if you want to hide some of the built-in sites), choose Manage Search Providers.

The main part of the WebSearch screen is a web browser window that displays your results. Like a standard browser, the web address is displayed at the top of this window, with Back, Forward and Refresh buttons to the left. A down button at the right side lists recently viewed sites, which you can revisit by selecting from the dropdown menu. Add WebTag adds a link to the current website to the card of the person on whom you’re searching. To open your results in your regular web browser instead, click the Use External Browser checkbox. (Note that this disables the Add WebTag button.)

13. Search from within Legacy Family Tree.

A similar hack works to search from within the free Legacy Family Tree genealogy software. Start by selecting Search Internet from the Internet tab on the Ribbon bar. Legacy comes preloaded with 30-plus sites to begin your searching. A dropdown combo box at the top of the Search Internet page displays all the current options. In the Deluxe Edition ($34.95), you can click Customize Searches to add, delete or edit sites.

Here, too, the search focuses on the currently selected individual. Legacy pre-fills the necessary search fields with information from your file. You can change this data, however, before beginning your search. Fields that are not used for the currently selected site are grayed out. As you select different search sites, the appropriate fields are made available. To keep the search window open after a search, uncheck Close This Window after Each Search.

14. Upgrade your mobile web browser.

While most of these hacks focus on desktop or laptop surfing (though most also work on mobile devices), this one is specific to tablets and smartphones. Try the free Dolphin web browser, available for iOS and Android. It’s got the Evernote web clipper built in, along with nifty shortcuts for sharing web pages with nearby users, syncing bookmarks, and more.

15. Translate foreign-language finds.

Records from your ancestors’ overseas homelands won’t do you much good if you can’t understand what they say. Fortunately, the web is full of free translation tools. Google Translate can translate words or phrases from any of more than 90 languages; it even accepts voice input for some languages, and can speak translations in some. Type a web address to translate an entire page. Google’s free Chrome browser will offer to translate any foreign-language site you visit with it. You also can try Microsoft’s Bing Translator, which can handle more than 40 different languages.

16. Find vanished web pages. 

How frustrating is it to find something valuable online about your family history, only to have the web page vanish into the interwebs the next time you try to visit? The Internet Archive may have a solution for such puzzles. Its Wayback Machine (accessible via a link at the top of the Internet Archive home page) stores the history of more than half a trillion web pages, including many from sites that are no longer live. It’s the perfect place to track down that elusive page about your family that was once hosted on Geocities or some other platform now lost in the rapidly changing online landscape.

A version of this article appeared in the March/April 2017 issue of Family Tree Magazine.

Tuesday, December 22, 2020

Six Free Places to Look for Old City Directories

  Re-print from Family Tree Magazine

By Amy Johnson Crow

Share to Pinterest
Browsing city directories.

City and county directories are fantastic resources for genealogy research. Unlike the US census, which is taken once a decade, city and county directories are often published annually or every other year. This gives you more opportunities to put our ancestors in a specific place at a specific time. City directories are also indispensable when researching a house history.

Ancestry.com has a huge collection of digitized city directories. Its collection “U.S. City Directories, 1822-1995” has more than 1.5 billion records. (It’s also the third most-popular collection on the site, behind Public Member Trees and the 1940 federal census.)

Perhaps because of the size of the collection, many people think that if the directory isn’t on Ancestry.com, it doesn’t exist. Yes, Ancestry’s collection is enormous, but it doesn’t have everything.

Don’t worry! There are lots of places to look for the directories you need—and those listed below are free.

1. The public library in the city or county of interest

Public libraries often collect directories for their own city and county. Start with their online catalogs. However, many libraries don’t list each year of the directory they hold. The catalog might list only the earliest year, or give a range of years with no indication of missing volumes. If you don’t find what you’re looking for in the catalog, contact the library. (Bonus: Some libraries have digitized directories for their area. I recently discovered several Columbus city directories on the website of the Columbus Metropolitan Library.)

2. MyHeritage

More specifically, search the free Compilation of Published Sources on MyHeritage, which contains a variety of types of books in addition to city directories.

3. Internet Archive

Besides hosting the Wayback Machine, Internet Archive has digitized millions of items, including city and county directories. To find them, begin with a basic search of city directory or county directory (For example, Indianapolis city directory or Nassau county directory.)

4. Google Books

Use the same search strategy that you would on Internet Archive. However, be aware that some results may only be a snippet or preview of the full directory.

5. Online Historical Directories Website

This website has links to hundreds of online directories. Also check out Linkpendium and Cyndi’s List (note that some of the links on these sites lead to fee-based resources).

6. WorldCat

If the local public library doesn’t have the directory you need and you can’t find it digitized online, look it up in WorldCat to see what other libraries have it.

Though Ancestry.com’s collection of city directories is massive, it doesn’t include all of the ones that have been published. The local public library and other websites can help you fill in the gaps.


Monday, December 21, 2020

6 Baby Steps to Organize Your Genealogy Research

With the new Year fast approaching, here is a re-print from family tree to help with any resolutions.  Enjoy

 By Diane Haddad

Share to Pinterest
Young child taking small steps across a green lawn.
If organizing your genealogy seems intimidating, remember that you can always start small, and break the process into more manageable pieces.

Does the word “organization” make you sweat? Do you find yourself often looking through stacks of research for a particular record or photo?

It’s an uneasy feeling when you don’t know whether you already have this or that information (and where you’d look to find out), where you got a particular record or “fact,” or how you’d retrieve files after a computer crash (if you’d even be able to). That must be why “get organized” is at the top of so many genealogy to-do lists for the new year.

Following these tips from professional genealogists won’t solve your organization problems overnight, but they can give you a small way to work toward accomplishing organized genealogy.

1. Keep an updated research to-do list.

I follow this advice with a research log in a spreadsheet on Google Drive. I can use my phone or computer to add ideas that come to me while doing other research. When I complete a task, I check it off and enter any findings (and then pat myself on the back).

2. Label and organize paper and digital file folders with a consistent scheme.

If you’re just beginning to climb your family tree, you don’t need to launch right into a detailed filing system. All you need to get going are some file folders and a plastic crate, or if you like using binders, a 2- to 3-inch three-ring binder with subject dividers. It doesn’t matter which you choose; what’s important is that your system is easy to use and — most important — to maintain.

3. Come up with a naming scheme for digitized photos and records, too.

For example, LASTNAME-FIRSTNAME-DAY-MONTH-YEAR-RECORDTYPE. As you develop your file-naming scheme, create a File-naming Cheat Sheet and post it next to your computer to help you maintain consistency.

4. Make time for organization every time you research

Take a few minutes to file or recycle papers and neaten your desk (or the dining room table) as you wind up a research session. You’ll be able to pick up next time with fewer distractions.

5. Keep a “to file” basket on your desk or a shelf, and schedule regular times to file those papers.

I do this with my family’s non-genealogy paperwork, which helps keep papers off the kitchen counter. Most of my genealogy is digital, so I have a “to file” folder on my hard drive (the problem now being the lack of a paper avalanche to remind me to file stuff).

6. Don’t waste money on unnecessary organizational supplies.

Before you buy anything, figure out what you need to organize. Declutter and decide how you’ll arrange what’s left. For example, would binders or filing drawers work best? What size bookshelf should house your library? Will you need archival boxes to store old photos? You might already have some of the supplies you need.

But no matter how many bins, drawers and shelves you have, it’s your research practices—not the boxes and binders—that’ll keep you organized.

Last updated: November 2019

Saturday, December 19, 2020

Holiday Traditions! Food for the Holiday's

This is a re-print of a recent post on Newspapers.com ... Enjoy!


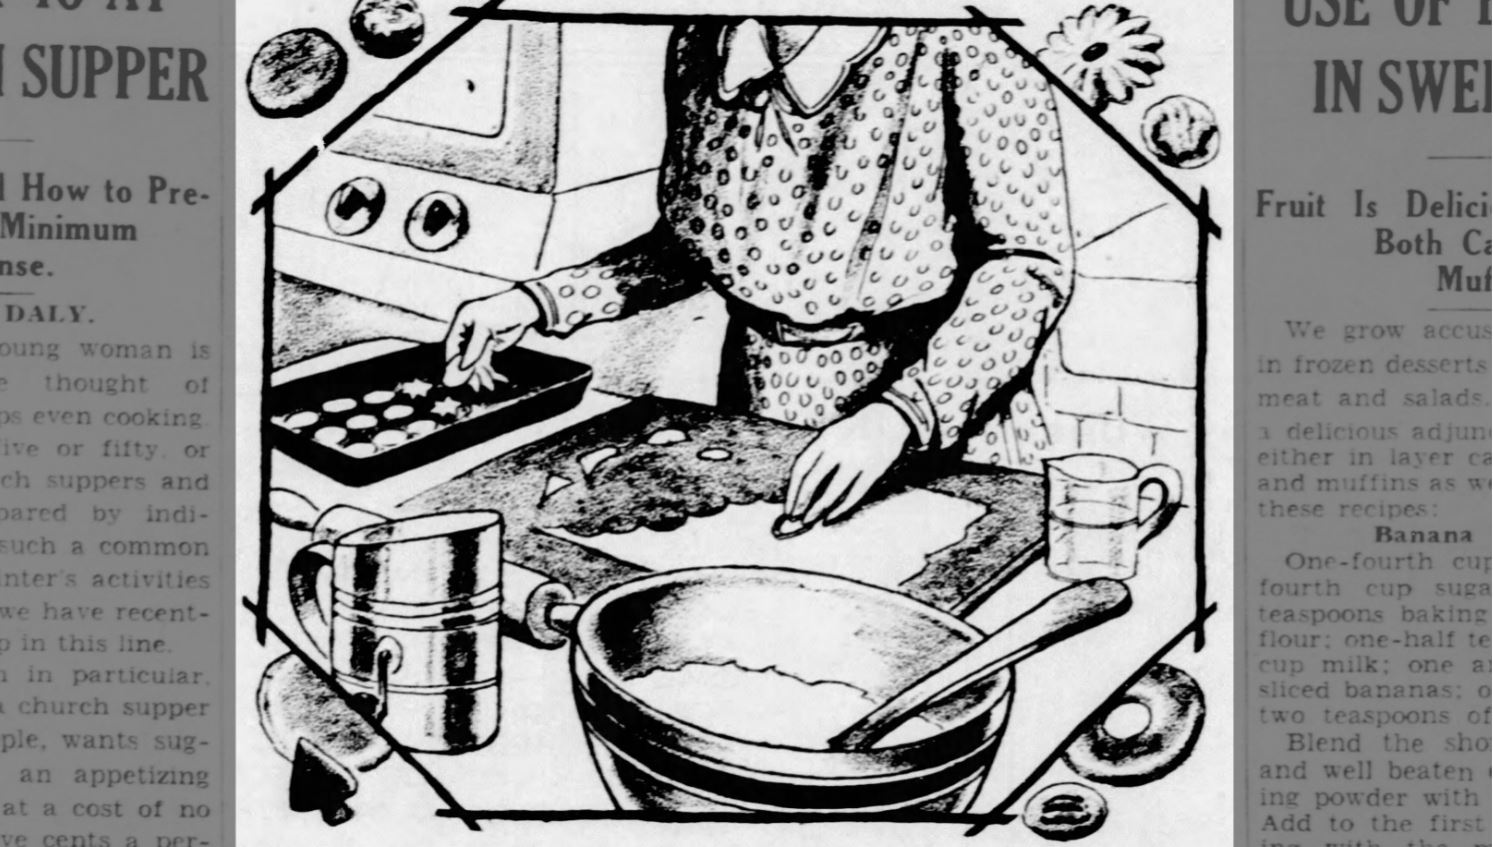
8 Delicious Holiday Dishes to Try This December

Looking for some vintage recipes to try this holiday season? We searched the historical papers on Newspapers.com to find these 8 recipes for delicious December dishes!

(Click on any of the recipes below to see a larger version on our site.)

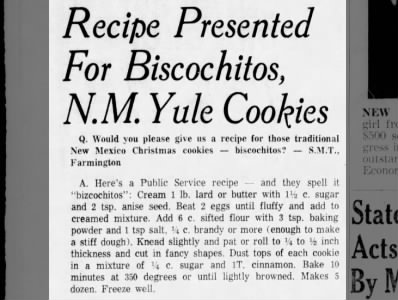
1. Biscochitos (from 1967)

Biscochitos (or bizcochitos) are anise-flavored cookies from New Mexico that are popular during Christmas.

Recipe: Bizcochitos (1967)Recipe: Bizcochitos (1967) Tue, Nov 28, 1967 – Page 14 · Albuquerque Journal (Albuquerque, New Mexico) · Newspapers.com


2. Cheese Blintzes (from 1959)

Similar to a filled pancake or crepe, cheese blintzes are a part of some Hanukkah celebrations.

Recipe: Cheese blintzes (1959)Recipe: Cheese blintzes (1959) Fri, Oct 9, 1959 – Page 5 · The Wisconsin Jewish Chronicle (Milwaukee, Wisconsin) · Newspapers.com


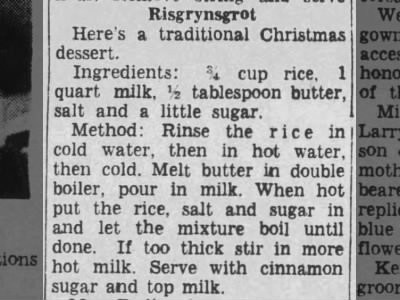
3. Risgrynsgröt (from 1959)

Risgrynsgröt is a Swedish rice pudding eaten during the winter months, especially around Christmas.

Recipe: Risgrynsgrot (1959)Recipe: Risgrynsgrot (1959) Sat, Sep 19, 1959 – 4 · The Herald-Press (Saint Joseph, Michigan) · Newspapers.com


4. Lebkuchen (from 1934)

Lebkuchen are a traditional German Christmas spice cookie.

Recipe: Lebkuchen (1934)Recipe: Lebkuchen (1934) Fri, Feb 2, 1934 – 2 · Iron County Miner (Hurley, Wisconsin) · Newspapers.com


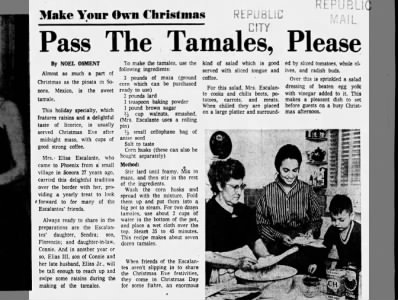
5. Sweet Tamales (from 1959)

Sweet tamales are a dessert made in parts of Mexico (and elsewhere), particularly at Christmastime.

Recipe: Sweet Tamales (1959)Recipe: Sweet Tamales (1959) Thu, Dec 24, 1959 – Page 6 · Arizona Republic (Phoenix, Arizona) · Newspapers.com


6. Applesauce Cake (from 1958)

Apple-based dishes and desserts are a common feature of Hanukkah meals.

Recipe: Applesauce cake (1958)Recipe: Applesauce cake (1958) Fri, Oct 3, 1958 – Page 7 · The Wisconsin Jewish Chronicle (Milwaukee, Wisconsin) · Newspapers.com


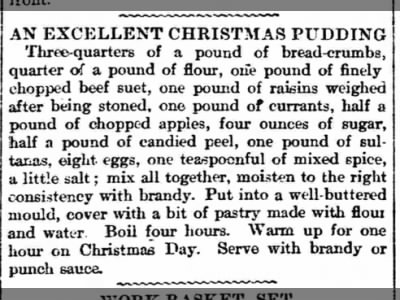
7. Christmas Pudding (from 1896)

Christmas pudding is a boiled or steamed pudding traditionally served at Christmas in the United Kingdom.

Recipe: Christmas pudding (1896)Recipe: Christmas pudding (1896) Wed, Dec 2, 1896 – 4 · The North-Eastern Daily Gazette (Middlesbrough, North Yorkshire, England) · Newspapers.com


8. Bonelos Dago (from 1966)

Bonelos dago (or Buñelos dagu) are yam-based fried donuts popular in Guam during the Christmas season and are typically eaten dipped in syrup.

Recipe: Bonelos Dago (1966)Recipe: Bonelos Dago (1966) Sun, Dec 11, 1966 – 9 · Guam Daily News (Agana Heights, Guam) · Newspapers.com