An ongoing journal of the history of the Bolles Family. From the first settler, Joseph Bolles of Wells, Maine in 1640, all past and present facts, thoughts, events, research and items of interest on this and allied families.
Photo books
are an inexpensive, crowd-pleasing way to share priceless family
photos, honor a loved one, or tell the stories you’ve discovered during
your research. Putting together a photo book is also relatively quick:
it’s a weekend job, compared to the hours of laborious work required to
create a traditional scrapbook or family history book. (If you’d like to
learn more about creating a family photo book, check out my article
series on choosing your images, five elements to include, and creating a page plan!)
Another nice thing about photo books for family history is that you
can easily and inexpensively print several copies. Keep one for
yourself, then print several for holiday gifts or reunion fundraisers! So which are the best photo book services when it comes to documenting family history?
There are so many online photo book creators and printers, where do
you even start? How about with this spotlight on five of the best photo
book services? We’ve reviewed their design options and prices for the
kinds of projects genealogists want to do: life stories, heritage,
tributes to loved ones, reunions, recipe books, and more.
Please note, along with the deep discounts from sales and promotions
sometimes means increased users on the site–especially before major
holidays. Occasionally sites may experience technical issues and you may
have trouble ordering your project. If you’re doing a time-sensitive
project, try to plan far enough ahead that any minor site slowdowns
won’t affect you.
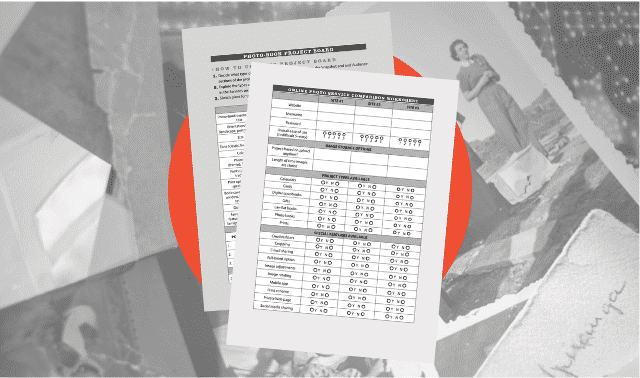
These two worksheets are designed to assist you create and organize old family photos for your projects.
1. Mixbook
Mixbook has won the hearts of photo book creators for offering tons of creative and fun designs in its crisp-looking books.
We give it top marks because several designs in the Family category
are perfect for telling heritage stories. These styles are gorgeous!
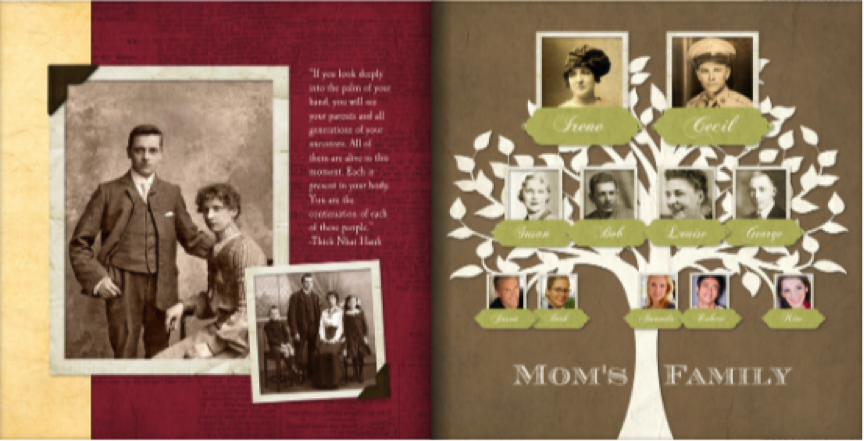
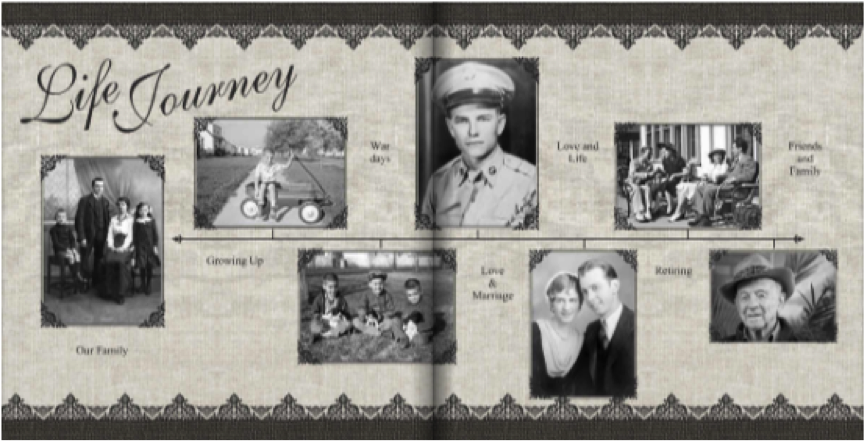
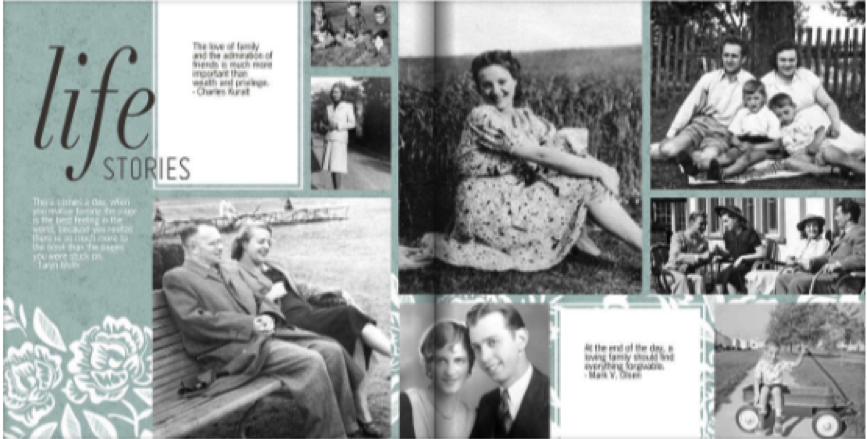
We’ve screen-shotted the following family tree layouts from the Family
History and Family Memoirs categories, respectively. The timeline layout
is from the Book of Remembrance design, and the life stories layout
from the Modern Remembrance design:
Genealogists may also appreciate Mixbook’s milestone, family reunion,
grandparents, cooking, adoption and military heroes designs; not to
mention the several options for mothers’ and fathers’ tributes. Watch
for sales and coupon codes for this popular site.
2. Shutterfly
Shutterfly
is a fantastic overall photo book service. It offers a fairly
easy-to-use interface with dozens of options, and excellent print
quality. Frequent sales bring the prices down significantly.
Browse through several different design categories to find the one
that best fits your album. The family category, for example, includes
heritage, reunion, adoption, African-American, Jewish culture, memoriam,
grandparent, family yearbook, recipe, life story, Spanish-language
family, and military hero. There are many tribute-to-loved-ones styles.
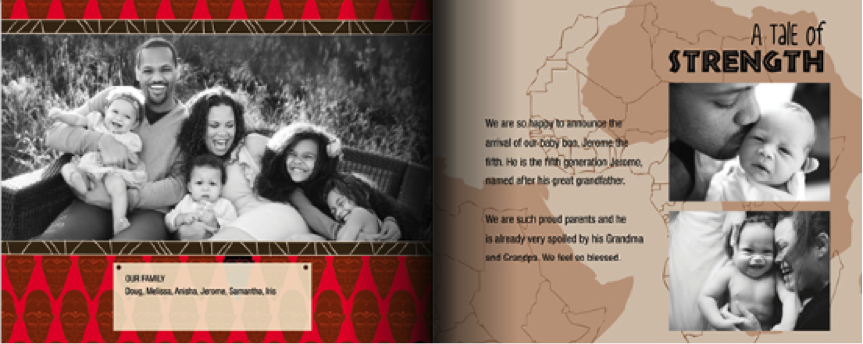
Here’s a two-page spread from the African American design:
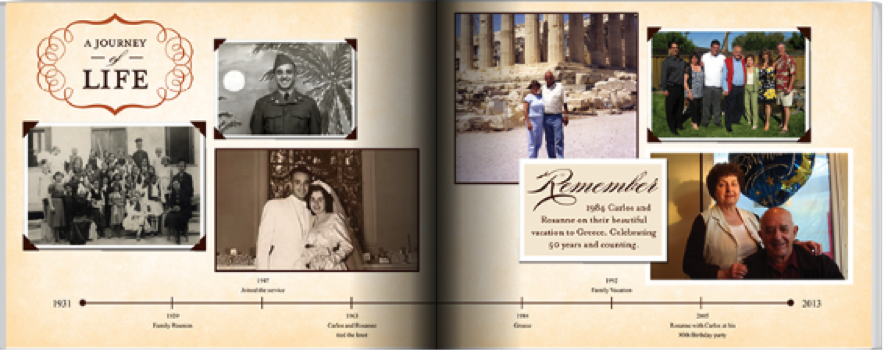
This is a simple timeline layout from the design called A Life’s Story:
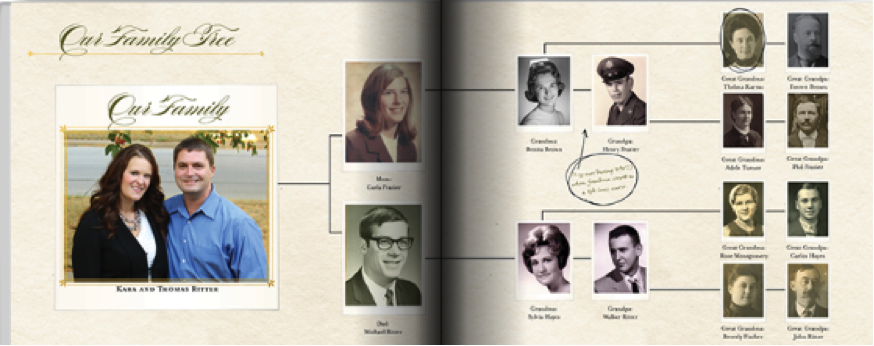
Check out this photo family tree from the Family Ancestry design:
Those who don’t want to lay out their own books may appreciate the site’s Make My Book
service: they’ll create your book for you in three days. Pay the small
$9.99 fee only if you order a book. A Spanish-language text option is
available, and so is an Apple Photos extension. The site offers frequent sales and promotions.
3. Adoramapix
Adoramapix
is a highly-regarded website catering to professional photographers.
Both the quality and price of its photo books reflect that focus. The
site offers a variety of album sizes, styles, and even paper finishes.
All albums are printed on photo paper and have a lay-flat binding (which
is an optional upgrade at the other sites reviewed here).
The designs are gorgeous, but more focused on an overall design
rather than a theme that might correspond easily with family history.
That said, the Mom and Me style is a good one to adapt for a family
album. The template incorporates nice options for journaling:
The Food category contains a gorgeous Farm to Brunch style that would make for a visually mouthwatering family recipe book:
Adormapix offers several journal-style templates. These would be
interesting to try if you’d like to print the pictures but handwrite the
stories, captions, and other text. (Note the site’s recommendations for
paper finishes that are best for writing on.) Though most of the
designs you’ll see don’t include much in the way of captioning, you can
always add text to the layouts.
As mentioned, Adoramapix is pricier than the other sites. So many
factors affect the price that specifics aren’t included in the
comparison table below. Click the link provided to calculate your own
project price. (For the sake of comparison, at press time, a 10” x 10”
hardcover, 20-page album with glossy or luster page finish priced at
$58.99.)
4. Snapfish
Snapfish
has offered photo printing services for many years. Its photo book
offerings for family history-themed albums are strongest in the Family
category. You’ll find those that honor mom and dad, grandparent
celebration, a family yearbook, a reunion theme, and family memories.
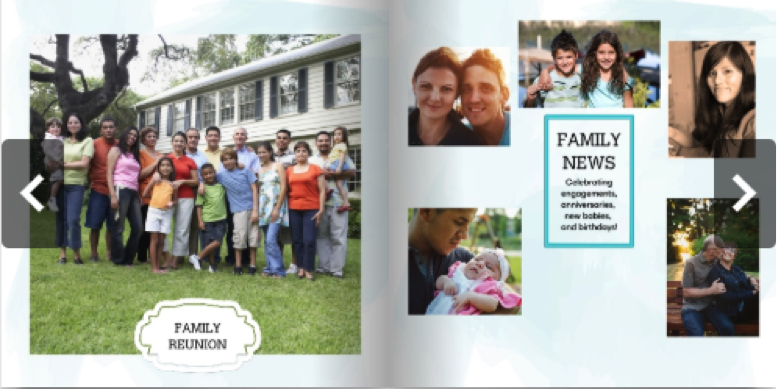
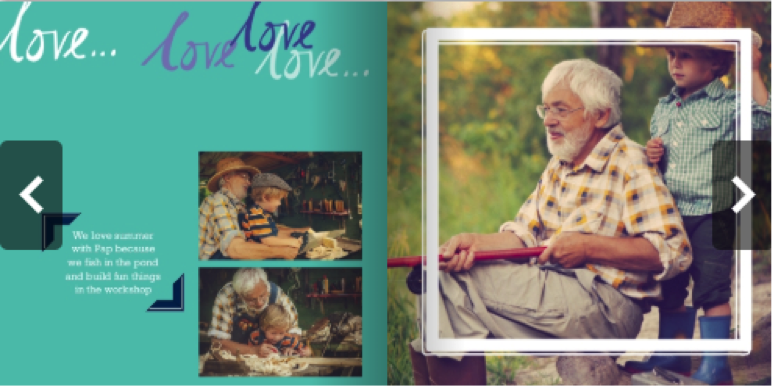
Shown below are pages from the Family Reunion and We Love Grandparents
design styles. Generally, the layouts seem a little less fancy than
those you find at sites such as Mixbook or Shutterfly.
You can use an Apple Photos extension with Snapfish. Some reviews of
Snapfish photo books have given the site lower marks for book quality.
Watch for frequent sales on photo books (and lots of other photo-related
products) at this site, too.
5. Amazon Prints
Amazon Prints
offers a basic photo book service with good print quality and an
everyday low price: a great pick for someone who wants a no-fuss option
without waiting for sales. This is also an easy option for Amazon Prime
members, who get free shipping and can easily access any images they’re
keeping in their free unlimited Amazon photo storage.
The downside to this wallet-friendly option for the genealogist?
There are just a small number of designs, categorized as Travel + Life
Events, Baby, or Everyday. You’ll have to be creative about adapting
them for heritage use. For example, you might adapt this Explore the
World travel theme for an immigrant ancestor’s book:
Or, keeping in mind that you can create your own headers and
captions, adapt this classic-looking color palette (the style is called
Chic Nuptials) for a heritage album of just about any kind:
FamilyTreeMagazine.com is a participant in the Amazon
Services LLC Associates Program, an affiliate advertising program
designed to provide a means for sites to earn advertising fees by
advertising and linking to Amazon.com and affiliated websites.
Have you watched any old home movies lately? Compared to family
photographs, film and video have a short lifespan — so don’t let your
own “moving pictures” fade into oblivion. Each of the services below can
convert your old movie film or videotapes to digital format, then burn
the footage to DVDs you can view on your TV or computer. Many services
also offer custom chapter marks and other personalization features.
Cost: Digital conversion starts at $19.99 per videotape or 50-foot film reel; add $9.99 to get a DVD. Options: For
an extra fee, get a USB drive loaded with your movies. They also offer
cloud storage. Ship in your own box or a prepaid SafeShip Kit. Features: See
It Before You DVD It converts your film to digital format, then you go
online to sort, label, and organize films to save to DVD. Set your own
chapter marks. Locations: Lab is in Scottsdale, Ariz. Set up your account and order online.
Cost: Prices start at $20.95 to convert video to DVD; film starts at $9.50. Options: ScanDigital can provide editable files on a USB drive. Features: Chapter points are set using Scene Detection, or choose custom points. Locations: Lab is in Fishers, Ind. Set up your order online and follow instructions for secure shipping.
Cost: Prices vary widely by store. A two-hour VHS-to-DVD conversion costs $28.99; film starts at $28.99 for the first 100 feet. Options: YesVideo doesn’t offer editable files or any type of custom work. Features: DVDs
feature chapter menus and the ability to personalize with a title,
background music and theme. Purchase includes 60 days free access to
view and share videos online. Locations: Labs in Norcross, Ga., and Campbell, Calif. Drop-off services through local retailers including Costco, CVS, and Walmart.
A version of this article appeared in the March 2011 issue of Family Tree Magazine.
The home of more than 3 million federal land title records for
Eastern public-land states (1820 to 1908) keeps getting better. The
bureau is now adding field notes from the original surveyors, which may
include the names of settlers living in the area, along with images of
land warrants issued as a reward for military service. Images related to
survey plats and field notes, dating to 1810, are also coming online as
each state’s documents are completed.
Unquestionably the coolest way to map your ancestors, Google Earth
lets you “fly” across the planet to view satellite imagery, maps,
terrain, 3-D buildings and historical imagery. You can save your toured
places, share with others and (with some tech know-how) combine your
data with the site’s geographical info in a “mashup.”
Another site you’ll need to persuade your library to buy into,
ProQuest’s collection of digital maps features more than 200,000
high-resolution, full-color historical maps. These include property maps
from the late 1700s to the present and antiquarian maps from the 15th
to 19th centuries, plus city directories. There is also a version of Historical Map Works aimed at individual subscribers.
Search for small-scale, high-detail maps (up to 1:25,000 scale) of
anywhere in the United Kingdom simply by entering the place name, full
postal code or National Grid reference, then print the maps or copy for
use on your genealogy website.
Need a map of the British Isles in 1603 or Dublin, Ireland, in 1610?
How about a map of France in 1791? Or Cincinnati in 1880, Dodge City in
1920 or New York City in 1642? You’ll find all of these—and plenty
more—in this vast collection, courtesy of the University of Texas
library.
If you can’t find and map your ancestral stomping grounds with the
array of tools assembled at this website, the place probably never
existed. Buy or download current maps, topographic maps dating back to
1882 and aerial and satellite images. You also can look up places past
and present in the National Atlas or Geographic Names Information System
(GNIS), then plot and customize them on the National Map.
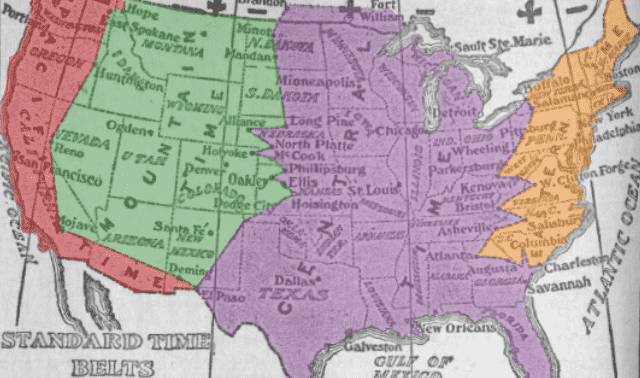
The Standard Time Act in 1918 formally established
four US time zones. This map shows the railroads’ time zones five years
earlier, in 1913. (Wikimedia Commons)
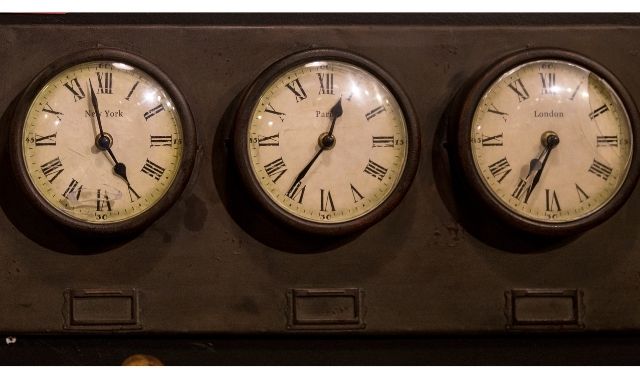
Does anybody really know what time it is? For our ancestors, the
answer depended on where they were, with each town’s official
clock—typically on a church or city hall—set by the sun, which would be
overhead at noon each day. Estimates of the number of these local “time
zones” range from 300 to 8,000 across the United States alone. “Sun
time” differs by four minutes for every degree of longitude, making New
York and Boston eight minutes apart.
When your clocks “spring forward” or “fall back” with Daylight Saving
Time, take a moment to observe the birthday of America’s standard time
zones. On Nov. 18, 1883—the “day with two noons”—most places in the
continental United States adopted the system of four time zones
originally known as Standard Railway Time. The railroads had been
struggling with 100 different local time zones of their own devising.
This inconsistency was the impetus for standardization, made possible by
the telegraph.
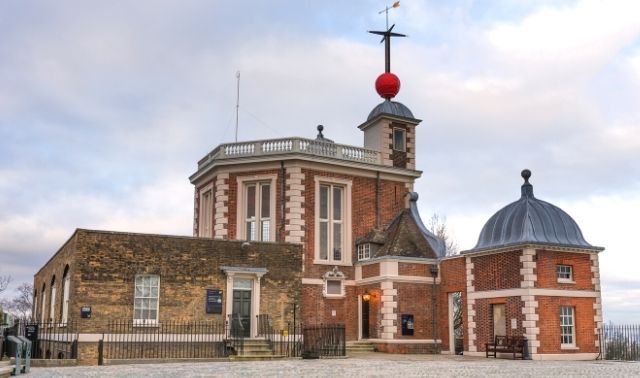
Another mode of transportation—the sailing ship—inspired the earliest
efforts to standardize time. The Royal Observatory in Greenwich,
England, established Greenwich Mean Time (GMT) in 1675 as an aid to
mariners in determining longitude. In 1764, John Harrison perfected the
use of clocks to determine a ship’s east-west position at sea. Each town
in England, however, continued to set its own clocks by the sun.
How Railroads Created Time Zones
England’s railroads also needed standardization for their timetables.
In 1840, the Great Western Railway became the first to adopt London
time, and most railroads soon followed suit. In 1847, the Railway
Clearing House recommended switching to GMT. The Royal Observatory
transmitted its first telegraph signal for setting clocks on August 23,
1852, and by the mid-1850s, most public clocks in Britain were set to
GMT. A few holdouts used a pair of minute hands—one for local time, the
other for GMT—and the legal and electoral system followed local “sun
time” until 1880.
In the United States, amateur astronomer William Lambert lobbied
Congress for time standardization as early as 1809. The idea didn’t gain
traction until 1869, when Charles Ferdinand Dowd drew up a plan for
“Railway Time.” Dowd ran a school for girls in Saratoga Springs, NY, and
developed his ideas as a teacher posing problems to students.
Initially, he proposed a single, nationwide time zone based on the time
in Washington, DC, similar to England’s GMT. But the vastness of the
United States made that impractical, so in 1872 he revised his scheme to
create four sections set off by an hour, similar to those used today.
Despite being ratified by a group of railroad managers, Dowd’s plan
stalled.
The need for standardized time grew more urgent with the expansion of
the railroads. When the Golden Spike completed the Transcontinental
Railroad in 1869—the same year Dowd proposed his initial plan—the time
was 12:45 p.m. at the site in Promontory Point, Utah; but 12:30 p.m. in
Virginia City, Nev.; 11:44 a.m. in San Francisco; and 2:47 p.m. in
Washington, DC. The railways’ 53,000 miles of tracks operated according
to at least 80 different timetables.
Time Zones Come to the US
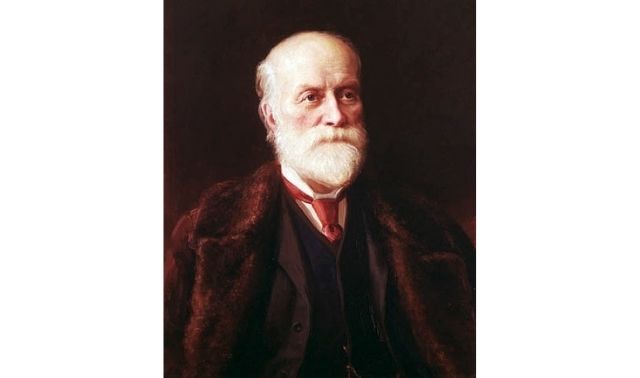
A Scottish-born Canadian railway engineer, Sir Sandford Fleming, led
the next push for standardizing time not only in North America, but also
around the world. In 1878, he published “Terrestrial Time,” a pamphlet
that set out a plan similar to Dowd’s and advocating for global time
standardization. He cited the problem of a steamship traveler from
Britain arriving in America and transferring to a train. How, Fleming
reasoned, could such a traveler know what time to catch his train?
Fleming’s proposal also might have languished if not for William F.
Allen, another railroad engineer and editor of the Official Guide to
Railways. Allen became a crusader for standardized time, traveling the
continent to drum up support. Another booster, Cleveland Abbe, the first
head of the US Weather Bureau, put his weight behind standard time and
enlisted the American Meteorological Society. That society’s 1879
“Report on Standard Time” helped push the railroad companies to
institute a version of Fleming’s plan in 1883.
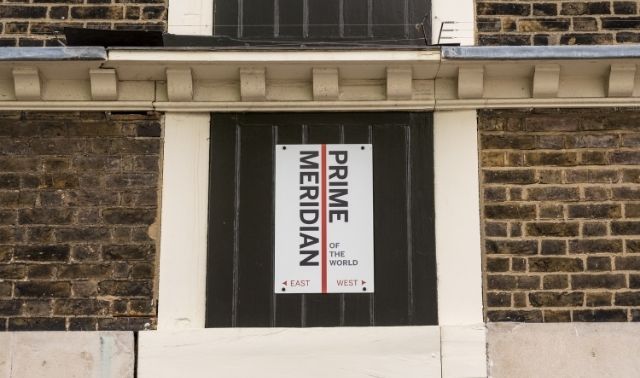
The following year, under Fleming’s leadership, the International
Prime Meridian Conference met in Washington, DC. The conference agreed
on Greenwich as the “prime” (zero degrees) meridian from which 24
international time zones would be calculated. Each zone represented 15
degrees of longitude and one hour of time.
American adherence to the new time zones remained voluntary, and a
few places resisted. Detroit, about halfway between the meridians for
Eastern and Central time, stuck with local time until 1900, tried
Central time for awhile, then by popular vote adopted Eastern time in
1916.
The Standard Time Act of 1918
US time zones weren’t mandatory until March 19, 1918, when Congress
passed the Standard Time Act, stating that the Interstate Commerce
Commission would regulate time zones (taken over by the new Department
of Transportation in 1966). Even so, the boundaries and number of zones
across the continent have been fluid. Alaska was originally split into
four time zones, but in 1983, with the exception of the westernmost
Aleutian Islands, the state switched to a single Alaska Standard Time
zone. Time zone lines have moved slightly westward since 1918, too, as
places on eastern edges jump to the adjacent zone in search of an extra
hour of daylight in the evening.
That 1918 act also gave all Americans an extra hour of evening
daylight by instituting the nation’s first daylight saving time. The
controversial wartime measure was repealed the next year, then
reinstituted year-round as “War Time” during World War II, and finally
standardized by the Uniform Time Act of 1966. Loopholes still let states
and localities opt out: Arizona, Hawaii and several US territories
don’t observe daylight saving time.
Today, the United States and its territories encompass nine standard
time zones in Coordinated Universal Time (UTC), the successor to GMT.
These nine zones range from UTC minus four hours to UTC minus 11 hours,
as well as UTC plus 10 hours in the Pacific.
US Time Zones History Fun Facts
Nepal was the last country to adopt a standard time based on GMT (plus 5 hours, 45 minutes), in 1986.
Not
all countries embraced standard time zones with even hours based on
GMT. Several, including India, Iran, Afghanistan, Myanmar, Sri Lanka,
Venezuela and parts of Australia, use half-hour deviations, while a few
use quarter-hour differences.
China is the largest country with a
single time zone; until the Communist takeover in 1949, it spanned five
zones. France, with its islands in the Caribbean and Pacific and its
jurisdiction over Guiana in South America, has the most time zones, with
12.
Before
standardization of daylight saving time in 1966, bus drivers on a
35-mile stretch of Route 2 between Moundsville, WV, and Steubenville,
Ohio, had to reset their watches seven times.
Time Zones History Timeline
1675
Royal Observatory is built in Greenwich
Sir Sandford Fleming proposes a worldwide system of time zones
1878
1880
Greenwich Mean Time becomes Britain’s official time
US railways adopt standard time zones
1883
1884
International Prime Meridian Conference selects Greenwich as the standard for zero degrees longitude
Congress passes the Standard Time Act
1918
1964
“Leap second” is introduced to account for Earth’s slowing rotation
Official standard switches from GMT to the Coordinated Universal Time atomic clock system
Many Americans with Ashkenazi Jewish genealogy have a mental picture
of their Eastern European ancestors shaped more by “Fiddler on the Roof”
than by any reliable family information. But the musical’s depiction of
Jewish life in Eastern Europe oversimplifies the hardships European
Jews faced in the insular small towns they had lived in since the late
Middle Ages.
Jews were permitted to live and work in greater Poland (unlike in the
Rhine Valley region from which their ancestors had been expelled), but
only in certain places and at certain jobs. In the small market towns
they formed called shtetls (or shtetlach in the
Yiddish plural), they enjoyed a favored economic relationship as
middlemen in the distribution of goods from feudal estates. Except for
their traditions, as Tevye the milkman famously lamented, their lives
were as shaky as a fiddler standing on the roof.
In genealogy, we focus on finding your ancestor’s shtetl
because correctly identifying your ancestral town is one of the key
pieces of information (along with surname) to finding specific evidence
of your ancestors’ lives in contemporary record books. The shtetl also serves as a locus for general historical knowledge about your ancestors’ economic and social climate.
With so much genealogical information now available online, you’ll
need a hand in determining which resources to use first and how to frame
your research project. Let’s dive into how to find and use those
resources—not just to identify your Ashkenazi ancestors in Eastern
Europe, but also to understand the context of their lives.
Learning the basics of Ashkenazi Jewish genealogy
Jewish genealogy extends back to Biblical times. But the focus of
Ashkenazi genealogical research is in Central and Eastern Europe from
the 18th through 20th centuries, a realistic horizon for vital records
availability. Beginning as a small tribe of southern European Jews who
moved north in the early Middle Ages, the Ashkenazi produced large
families as well as an enduring cultural tradition. Today, Ashkenazi
Jews account for 75 percent of worldwide Jewry—despite the decimation of
the European Jewish population during the Holocaust.
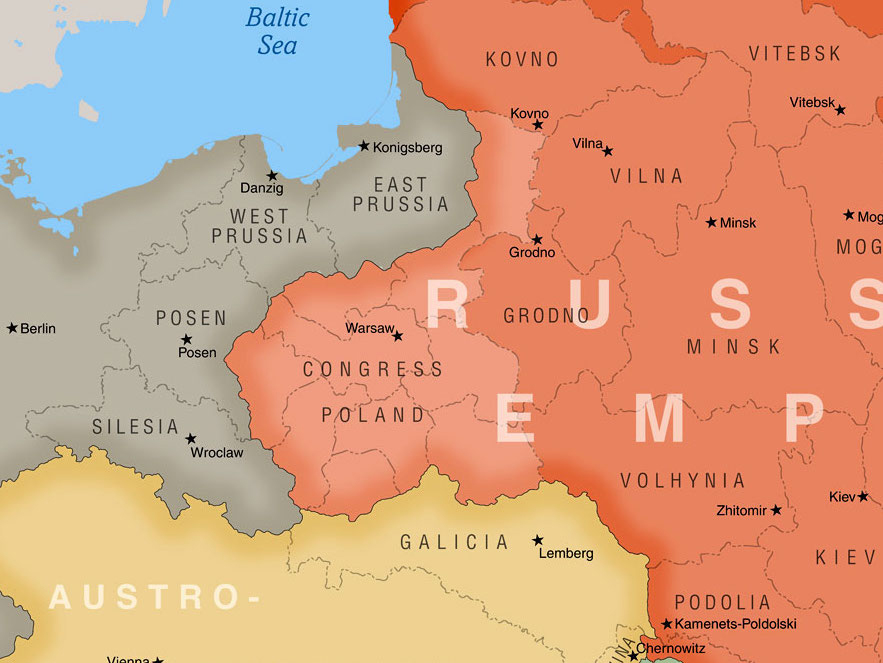
Find your ancestor’s hometown with this Jewish history timeline covering Eastern Europe.
Until genealogical interest began to boom over the past 30 years,
Ashkenazi Jewish ancestry was all but impossible to trace. Researchers
had no inventory of available records, nor any means to access them. But
since then, pioneering researchers, volunteer projects, and the
nonprofit portal for Jewish genealogy JewishGen have brought millions of records from all areas of Ashkenazi Jewish settlement online. In particular, the Jewish Records Indexing-Poland (JRI-P)
has indexed millions of records of Polish Jews from two major sources:
microfilms produced by the Church of Jesus Christ of Latter-day Saints
(LDS), and historical holdings of the Polish State Archives (PSA).
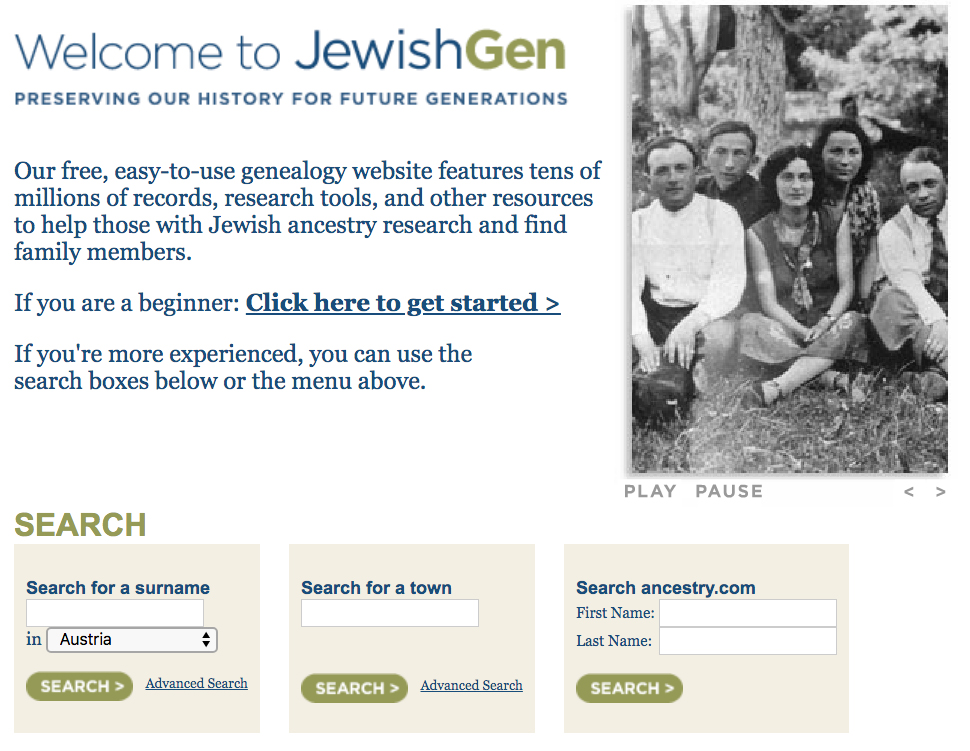
From JewishGen’s home page, you can search the site’s millions of Jewish records.
While not all records from these microfilms and repositories have
been indexed, the trove of searchable data made accessible through
JewishGen gives amateur genealogy researchers today an excellent chance
of discovering at least some evidence of their family roots in Eastern
Europe. Between its own resources and those of its partner
organizations, JewishGen offers a vast collection of databases,
communities and collaborative research projects.
You won’t rely solely on JewishGen resources to research your
Ashkenazi Jewish roots. However, it is the place to begin (and return to
repeatedly) as you work to identify ancestors and contextualize your
Jewish family history in Eastern Europe.
How to find your shtetl
For some, locating the shtetl is easy because a town name
has been passed down throughout the generations or has a consistent
spelling. But those researching a lesser-known town or (especially) a
common surname have a more difficult challenge.
Where to begin? First, decide the individual or family group you want
to research, preferably the first of your ancestors to come to North
America from Europe. You can repeat the process for other branches of
your family tree, but you’ll want to focus on one family at a time.
Next, search for records of your immigrant ancestors in the New World, including census returns, immigration lists and cemetery records.
Records, such as ship manifests, may directly identify a town of
origin. Likewise, cemetery records may mention a burial society or
benevolent association linked to the ancestral town. I found my Ratner
family’s previous place of residence on the ship manifest of their 1891
voyage from Hamburg to Liverpool, en route to New York. The record
revealed they actually came from a small Russian town, not the nearby,
more famous city mentioned in family lore.
At a minimum, US census records will give your ancestor’s birth
country: Russia, Prussia, Poland, Austria or another. From this more
general information, you already know something about your family’s
cultural heritage.
Keep in mind that the town name you identify in a family story or
even an official record may not be correct, especially if it was a
small, less well-known location. The town’s name may have been changed
in translation from Yiddish to English or in retelling from person to
person, and it will likely have multiple spellings.
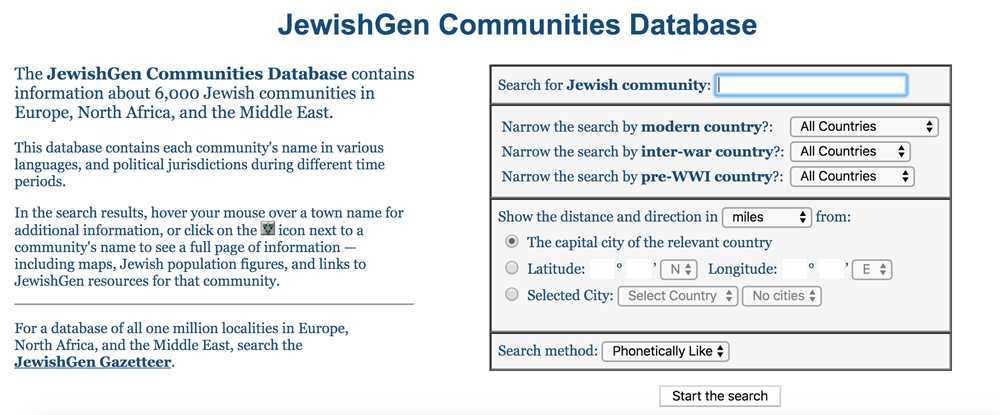
With JewishGen’s Communities Database, you can search for your ancestor’s shtetl by name.
Once you have an idea of your town’s name, turn to the Communities Database at JewishGen.
Also called the Town Finder, the Communities Database combines a
gazetteer of town names and geographical coordinates with a
comprehensive database of 6,000 historical Jewish communities. Type in
your town name, using your best guess at how it was spelled during the
historical period. If the search returns more than one matching town,
you can narrow your results by comparing the summary information to what
you already know about your family’s history.
When I searched for an ancestral town, the names of two possible
towns came up. Was it Rezhitsa in Latvia, or Rechytsa in Belarus? The
town name had been misspelled in records, so I couldn’t be sure of the
precise spelling. But the Latvian town (now called Rezekne) seemed to
fit since I found the family name on a residence list there.
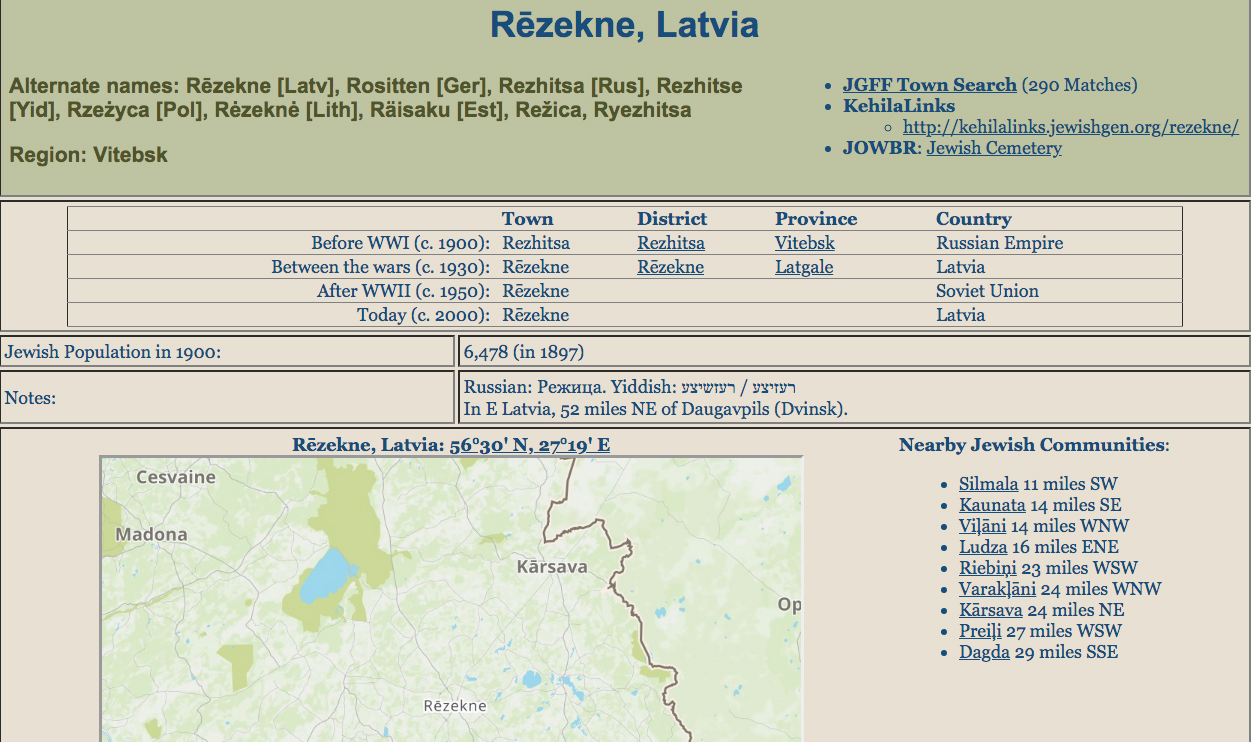
From the Communities Database search results, click through to a
locality page. There, you’ll find links to all available JewishGen
resources for the town, beginning with a map and a list of other Jewish
communities within a 30-mile radius. This could help if your ancestor
came from a smaller village outside a more prominent town.
Each
town’s page in the Communities Database contains valuable information,
such as alternate names, nearby settlements and historical regions.
Some JewishGen locality pages link to other databases within the site. For example, JOWBR (the JewishGen Online Worldwide Burial Registry) links to cemetery records that benevolent societies have connected to shtetl
towns. Others take you to rich repositories of knowledge about the
town, including memorial books and collections of town history and
memoirs.
Don’t forget to check out the locality page’s links and references to
non-JewishGen resources, which may offer new information. The Your Town function at JRI-Poland,
for example, provides a list of LDS microfilms for the town, which
could yield family information not yet in databases. JewishGen locality
pages also link to Virtual Shtetl,
a service of the Polen Museum in Warsaw that provides extensive town
collections (only a few of which have been translated to English).
Other town-based resources on JewishGen include the Special Interest Groups (SIG), which contains information and expertise about each town’s wider region. Likewise, the Family Finder contains a list of other researchers interested in the town.
Researching surnames
Having narrowed your target area to a town (or at least a province or
country), you’re ready to search JewishGen for your ancestor’s records
by surname. This is where you will access the JRI-Poland database of 5
million birth, marriage and death records, which covers all the regions
of greater Poland. You’ll also search thousands of smaller data
collections compiled by JewishGen, which include vital records for areas
not covered by JRI-P as well as content specific to the Holocaust,
immigration and other subjects. In aggregate, these additional JewishGen
contents account for some 18 million records.
Until recently, you needed to search separate databases for each
modern-day country where your ancestor may have originated. But you can
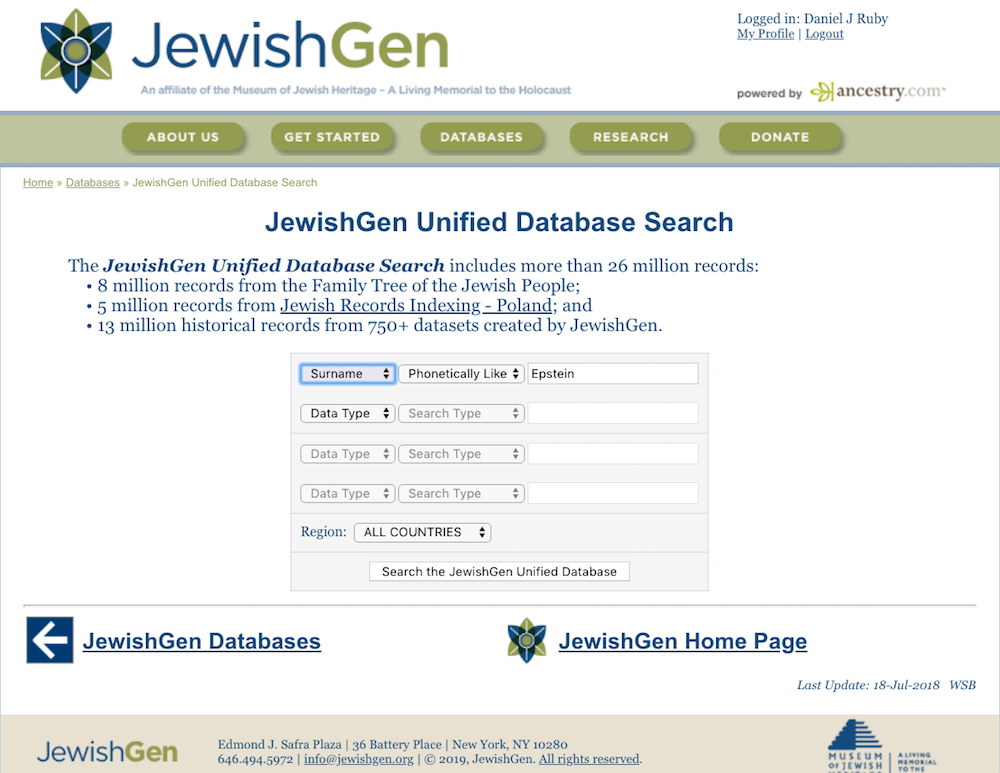
now search any or all of the country databases from the Unified Search page. Simply enter a surname to perform a global search.
You can search all of JewishGen’s collections on the Unified Database Search page.
The search results page displays the number of hits in each of
JewishGen’s databases. You’ll find many of the same databases as you did
when using the Communities Database. (You can also search JewishGen by a
combination of name and town to get the most targeted results.)
If your town was in an area of greater Poland, you’ll see JRI-Poland
listed as one of the databases, with matching records for your surname
broken out by province or sub-region. Click through to a region to see a
list of matching vital records, organized by town within the region.
Scroll through these pages to your town of interest to review a table of
records showing surname, given name, year, record type, metric book
citation, gender, parent names and more.
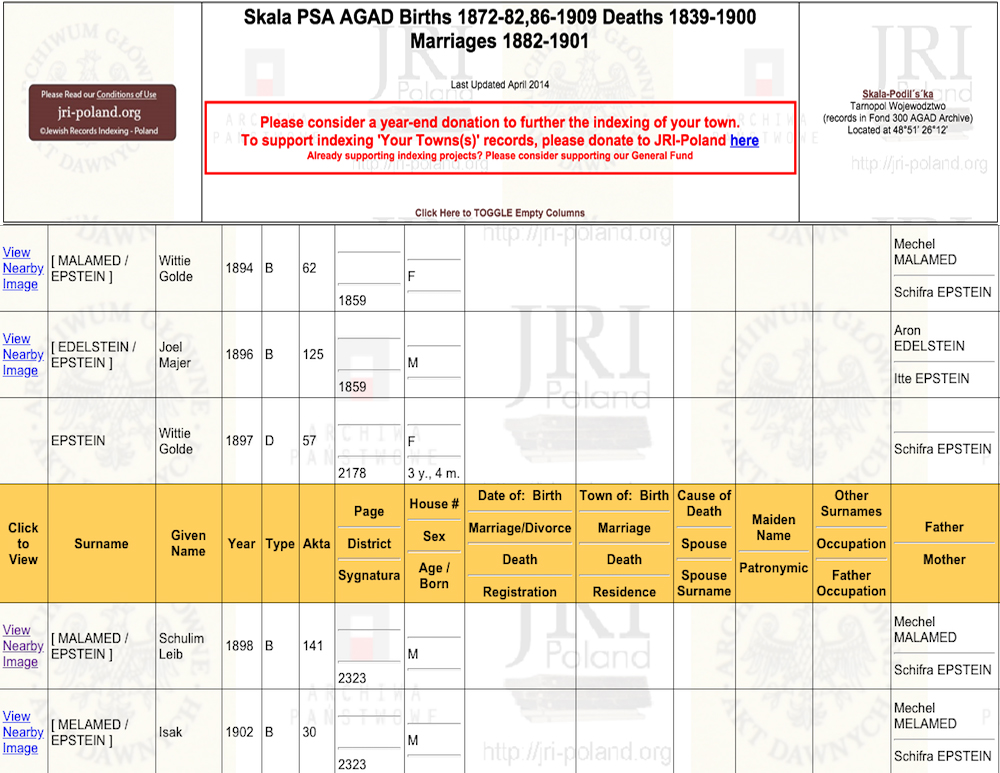
Drill
down to the JRI-Poland database, then select your ancestor’s town.
You’ll see a collection of records from that town, such as these from
Skala-Podolski in modern Ukraine.
Sometimes you may find other details, such as an occupation or house
number. I thought my Ringel ancestor in the town of Rzeszów, Galicia,
might have been a tailor, since his son and grandson were in the garment
business in Berlin. But vital records on JewishGen showed me he was
actually a kosher butcher.
If you’re lucky, the table of records for your surname and town will
contain your ancestor, whom you can identify by his given name and
possible life-event date. This is your key to discovering names and
birth/death dates of your ancestor’s parents, siblings and extended
family members. The true payoff comes if the record also has an LDS
microfilm number—or even a link to view and download an image of the
metrical book.
Many of your searches will come up blank. But other times, you’ll get
lucky and one of your ancestors will connect to a known body of
information. My Kaufler family from Kraków was well documented in a
research project that generated family trees for the 70,000 individuals
indexed in Kraków birth and census records. I typed in the surname, and
the site returned an automated hierarchical family tree showing not only
my ancestor, but also three more generations dating back to 1755.
In a similar vein, you might meet a distant relative through JG Family Finder who has information that was unknown to you. The Family Tree of the Jewish People,
another JewishGen feature, is a collaborative family tree that may
include data about your ancestors. However, be aware that information in
collaborative trees may be speculative or poorly sourced, so treat it
with care.
Be alert for common pitfalls. Your ancestor might have a common name,
or his name may have inconsistent spelling. As a result, don’t
automatically assume that a hit is your ancestor. You’ll need more than
the right surname and town name to make certain a record is really for
your relative. In addition, the first town name you find may not be the
family’s original location. Rather, records might point to other towns
and (hopefully) earlier generations.
Look out for unusual name situations. For example, there are several reasons that children from a shtetl
may have carried their mother’s (rather than their father’s) surname.
In Galicia, many Jews who married in the synagogue resisted the
government’s requirements to also obtain a civil marriage license. As a
result, officials considered their children to be illegitimate and thus
gave them the mother’s surname.
In other circumstances, children may have been given their mother’s name as a matter of yichus, or genealogical pride—if she came from a famous rabbinical family, for example.
Putting Ashkenazi Jewish genealogy records in context
You never know where a breakthrough will come from. As you discover
and document your family information, you will piece facts together into
a bigger narrative that places your family story in historical context.
Your goal is to situate family members in the larger sweep of
history—their political status in imperial Europe, their way of life in
the shtetl, their migration story of dislocation and resettlement, and their experience of loss and survival during the Holocaust.
To elaborate your family’s story, you will need to consider the facts in light of several common frameworks.
Tradition
For hundreds of years, life in the shtetl was based on
tradition—prescribed religious practices, the spoken Yiddish language,
and communal activities. Marriages were arranged, and (given the high
rate of child mortality) shtetl Jews had large families. The
Jewish community looked out for its own. In the rigid economic
structure, Jews typically filled two roles in society—by making things
as artisans or tradesmen, or by selling things as merchants or dealers.
Modernity
By the 19th century, Jewish communities throughout Eastern Europe had
collided with the modernizing world through technology and
communications. More progressive citizenship laws in certain regions
gave Jews access to the economic mainstream (at the expense of their
cultural isolation). Young, well-educated Jews settled in Western
capitals and made an impact in business, the arts and science.
Meanwhile, a non-religious Jewish identity arose around Zionism and the
idea of a Jewish homeland. For those individuals, socialist political
ideals held strong appeal.
Migration
Widespread poverty, military conscription and a wave of anti-Jewish
persecution were among the factors that set off a period of mass
emigration throughout Jewish regions. About three million Jews left the
Russian Pale between 1881 and 1914. Many left for America, but not all
migration was transatlantic. Migrants also flowed to cities across
Central and Western Europe, where many of them thrived as merchants.
Holocaust
Anti-Semitism, a theme in Jewish life since the beginning of the
Christian era, reached its zenith during the Nazi’s “Final Solution,” in
which more than 6 million European Jews perished. Those that saw the
warning signs and could leave did so, but even those with resources
found few places in the world that would take them. My mother, for
example, escaped Germany in 1938, but many of her extended family
members did not. I found testimony about the fate of two of her aunts
and a cousin in the Yad Vashem Names database. Another relative, her great-aunt, was deported from Berlin and murdered at Treblinka. For those living in occupied shtetls, life became a spiral of confiscation, forced labor, ghettoization and extermination.
Diaspora
Jewish life did not die in Europe in the 1940s, though Ashkenazi
communities changed forever. Earlier waves of migration created
significant Jewish communities in North and South America, in English
Commonwealth nations, and in Israel, the national Jewish homeland
established in 1948.
Digging deeper into your Ashkenazi Jewish ancestors’ past
You can continue learning the history of your town—both about its
19th-century heyday and its decimation in the Holocaust—through memorial Yizkor books and KehilaLink pages.
Yizkor books are collections of writings about major Jewish
communities, originally compiled in Yiddish by Holocaust survivors and
partially translated and supplemented by town historians. KehilaLink
pages are similar collections, but are only online and cover more
communities.
Your ancestor and his family may have been mentioned in one of the
memorials. But even if not, these sources will reveal details of the
economic and social life of the shtetl, as well as introduce the town’s well-known historical figures and memorable characters.
Special interest groups are also essential repositories of knowledge and content specific to major regions. Gesher Galicia and LitvakSIG
are two of the best developed, with their own collections, research
projects and services. There’s a regional SIG covering every Jewish
community. Through SIGs, you can subscribe to discussion lists, access
content collections, and tap community knowledge using features such as ViewMate, which crowd-sources document translations.
Researching subjects like immigration and the Holocaust will likely
lead you to outside resources for finding family records. You can start
your research using the JewishGen’s InfoFile feature,
which compiles links and how-to articles by subject. Besides
immigration, InfoFile has collections on cemeteries, genetics, the
Holocaust, geographic regions and more.
Commercial genealogy tools like Ancestry and MyHeritage
are also great resources for immigration records, among their other
features for Jewish genealogy. Both companies enjoy a close relationship
with JewishGen; MyHeritage sponsors JewishGen’s Family Tree of the
Jewish People, and Ancestry offers non-exclusive access to many (but not all) of JewishGen databases.
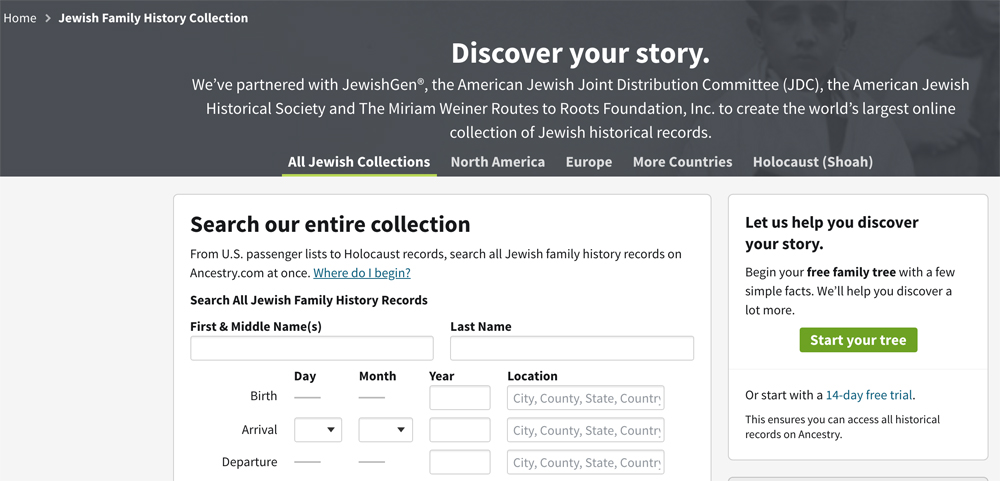
Ancestry offers large portions of JewishGen’s database of records on its site, if you’d prefer to search there.
JewishGen has its own Holocaust database
that contains more than 2 million records compiled from Nazi
documentation and other sources. But the most comprehensive database of
Holocaust victims is the Yad Vashem Central Database of Shoah Victims’ Names, known simply as the Names Database. JewishGen partners with Yad Vashem to solicit new testimonies. The collections of the U.S. Holocaust Memorial Museum, including concentration camp records and captured Nazi files, are another important source.
Having identified and located one relative or family in their
ancestral town, repeat the same steps for your other Ashkenazi family
branches. New facts and insights will keep on coming. Just while
reviewing facts for this article, I discovered a divorce in my
ancestor’s Ringel family in 1870; the married name of my grandfather’s
sister (as well as her fate in the Holocaust); and my
great-grandmother’s nickname (which matched my mother’s middle name).
You may find that the more that you learn, the more curious you
become. And in time, if you really catch the bug, you’ll soon have your
own shtetl story to tell—one with your family members, not Tevye the milkman, in the starring role.
Many new genealogists begin their research by doing a Google search
for their ancestors. After that, they turn to subscription sites like
Ancestry and don’t look back. However, there is so much more to Google
than a basic search!
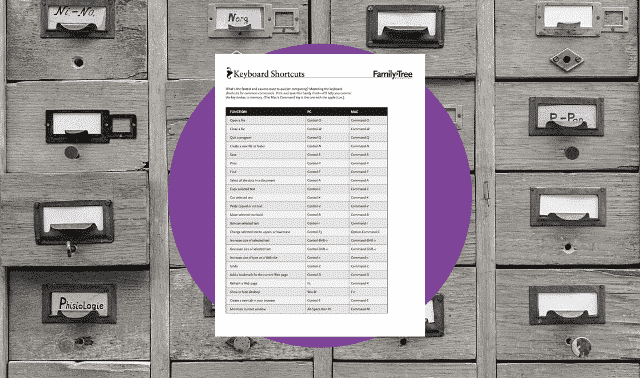
No need to click through your software menus—you can perform
many common computer functions with a few simple keystrokes, saving
time and energy. Refer to our handy list to learn keyboard shortcuts (on
Windows and Mac) for everything from searching to saving.
Armed with a few tips and tricks, you can discover more using Google.
Improve your Google searches with these pointers, and don’t miss out on
all the information this search giant has to offer!
1. Save time with synonym searches.
Save time with synonym searches. Rather than run separate searches on
similar keywords, include a tilde (~) before the term you want to find
variations of. For example, ~train history also finds pages referencing railroad history and locomotive history.
2. Set a date range.
Want to eliminate matches on modern people with your ancestor’s name?
Use a “numrange” to narrow your search to a particular time period:
Type Jehu Burkhart 1790…1830 to nab results that include that ancestor’s name plus any year between 1790 and 1830.
3. Fill in the blanks.
Don’t want to remember these special search operators? Try the Advanced Search form for a guided approach to setting your search parameters.
4. Hunt for histories.
Google is busily digitizing and cataloging books with expired copyrights—including county histories. Look for them using the Google Books search.
A version of this article appeared in the September 2010 issue of Family Tree Magazine.
It’s an age-old genealogical practice: painstakingly transcribing the
details of oral history interviews, handwritten documents, tombstone
inscriptions and other sources. Your typed versions capture the content
of sources you can’t “copy,” and even serve as backups for fragile
originals.
Whether you work with old love letters or church registers, though,
creating a good typescript can be challenging. How do you represent
illegible words? Should you correct “creative” spellings? Follow these
guidelines to create a typescript that’s nearly as valuable—and usually
more readable—than the original source.
1. Fill in the blanks.
Don’t let long-forgotten handwriting styles, inconsistent grammar and
ink smudges on old documents scare you. First, make an initial pass
through the document. Using a computer or word-processor, type whatever
you understand at first glance. Leave asterisks (*) in place of letters
or words you can’t read.
As you become familiar with the handwriting, you’ll be able to
interpret more—for tough passages, try the deciphering tricks in the January 2009 issue of Family Tree Magazine. Sections that remain a mystery will be permanently marked with asterisks.
2. Stick with their spellings.
It’s tempting to correct Grandma’s grammar, clarify misstatements or
delete boring parts—but type the text just as it reads. Don’t change
even misspellings or abbreviations. These details give insight into the
past, and add charm and individuality. When you reproduce the text
faithfully, you also open the door for reinterpreting it as new research
surfaces.
But you can change punctuation. Many old handwritten texts aren’t
punctuated at all—or even divided into paragraphs—which would make your
transcription difficult for others to comprehend. Consider making a
typescript without added punctuation as your “original,” then create a
readable second version with punctuation and paragraphs.
3. Re-create the appearance.
Try to duplicate visual details with your word processor’s
text-formatting functions: bold, italics, strikeover and so forth.
Re-create special spacing or text placement, too. If a date appears at
the top right margin of the original, place it there in your typed
version.
When typing columns of data—say, from an old ledger or
census—consider entering it in a table or spreadsheet, if you know how
to use one. Values (weights, dates) should be typed exactly as they
appear: 3d or 5/12.
End family collection chaos! These seven tech tools help you
turn your archive of old photos, papers and artifacts into an organized
research resource.
4. Add meaning.
Afraid your readers won’t understand 3d or 5/12? Itching to modernize
a spelling? You can add your comments, clarifications and corrections
in one of two ways: brackets [ ] within the text or footnotes/endnotes.
If you use brackets, note that the material inside them is yours.
Finally, proofread your work. Read the original aloud slowly and
check it against your document every few words. Better yet, have a
partner read it to you as you follow along in your copy—this process
catches a lot of mistakes.
In the end, your typescript will be true to the original content. And
though your version may not seem as priceless as a faded love letter,
yours will be probably be read and shared long after the first has
crumbled away.
A version of this article appeared in the March 2009 issue of Family Tree Magazine
Surnames, also called family names and last names, are names added to
the end of a person’s first or “given” name. The creation and adoption
of surnames are largely based on culture and nationality. It’s believed
the Chinese adopted the practice of hereditary family names as early as
2852 BC. England began relying on them around 1000 AD. In some cultures,
Filipino and Turkish for example, surnames weren’t readily used until
as late as the 19th and 20th centuries.
Surname origins tend to fall into one of four categories: patronymic
(named from the father), occupational, nickname or place name. According
to Elsdon Smith, author of American Surnames
(Genealogical Publishing Co.), a survey of some 7,000 surnames in
America revealed that slightly more than 43 percent of our names derive
from places, followed by about 32 percent from patronymics, 15 percent
from occupations, and 9 percent from nicknames.
In your genealogy research, you’ll likely come across most of the four main categories of surnames:
Patronymics
Virtually every culture seemed to have some form of patronymic
system, though some relied on it more heavily than others. In Ireland,
the Scottish highlands, Wales and Spain the majority of names are
patronymics; likewise in Scandinavia, though these have additional
complications.
Occupational names
Surnames derived from occupations figure prominently on the list of
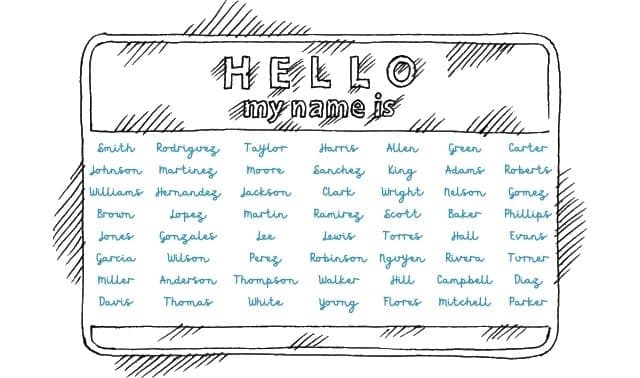
America’s most common surnames, including Smith, Miller, Taylor, Clark,
Walker, Wright, Baker, Carter, Stewart, Turner, Parker, Cook and Cooper.
During the Middle Ages, it was useful to distinguish John the baker
from John the tailor. The occupations were fairly common across Europe,
and their use as surnames took on a decidedly local flavor.
Place names
Surnames sprang from place names in several ways: when someone was
associated with or living near or by a particular hill, brook, bush,
dale, valley, island, bridge, meadow, road or village; when the person
was known as coming from a particular locality; and when the individual
owned a manor or village. Place-derived surnames dominate in England and
they’re common in Germany and France.
Nicknames
The word “nickname” is derived from “an eke name,” or added name. In a
sense all surnames began as extra names, so technically speaking, all
surnames are nicknames of one sort or another. In our classification
scheme, hereditary family names based on nicknames often describe an
ancestor’s appearance (stature, hair, eyes, complexion, size), a
characteristic or trait (strong, bold, brave), financial status, habits
or special skills. Nickname-based names were popular in Italy and
Portugal. Sometimes, this form was mixed with the patronymic system as
in the Italian D’Onofrio, “son of a giant.”
Often the lines blur between the categories. Take the example of
Green. This name could come from one’s clothing or given to one who was
inexperienced. It could also mean a dweller near the village green, be a
shortened form of a longer Jewish or German name, or be a translation
from another language.