Search This Blog

Monday, March 7, 2022

DNA Q&A: How to Understand Missing or Unexpected Matches

By Diahan Southard

Sometimes your DNA matches don’t quite match what you expected. Maybe you and your mom don’t have all the DNA matches you expected, or you can’t find a particular surname among your matches. Expert Diahan Southard breaks down why this might be the case—and what to do if a relative isn’t actually related to you like you thought they were.

Parents and Shared Matches

Q: My mom and I have both tested with AncestryDNA. Should she be a shared match for all my matches from her side of the family, because I received all that DNA from her? I have hundreds of matches, and she and I share only 12 of them. I thought things would be more equal between the two sides of my family.

A: Because of the way autosomal DNA is inherited—you get half of your DNA from your mom and half from your dad—every person on your match list should match one of your parents if your parents have been tested. But there are a few reasons why your match page might not look like you’d expect:

If you’re using the Shared Matches tool, which displays matches who share DNA with you and another person (in this case, your mom), remember that AncestryDNA shows you only shared matches who are related to both you and your mom as a fourth cousin or closer. So all those more-distant cousins won’t show up on that shared matches list.

If your dad’s side of the family is significantly larger than your mom’s—or, for some reason, a lot of people from his side are testing their DNA—you’ll probably see more matches from that side. If possible, test your dad or a close relative of his to shed more light on the close cousin matches you don’t share with mom.

If a branch of your family arrived in the United States relatively recently, their DNA is less likely to appear in a genetic genealogy database. Currently, due to database demographics—mostly Americans descended from European immigrants—test-takers whose families are recent immigrants or have roots outside Europe will have fewer matches than test-takers whose families have been in the United States for generations. This will change as the diversity of DNA databases grows.

Every so often, “ghost matches” crop up as distant cousins, causing you to have matches that don’t seem to come from either parent. But these matches are a result of DNA rearranging, instead of shared ancestors. 

You actually have two copies of each bit of DNA, one from Mom and one from Dad. But when testing companies look at your DNA, all they see initially is a big pile of values. They don’t know which bits go together. The process of figuring that all out is called phasing

Illustration of DNA genealogy phasing: DNA companies can't clearly distinguish between the DNA you receive from your dad from the DNA you receive from your mom. Because of this, companies can commit "phasing errors" that lead to unexpected DNA results

This illustration shows a simplified example of how a phasing error could happen. Each word is like a bit of your DNA that’s being analyzed. In section A, your mom and dad each have a sentence that makes sense. You carry around these two sentences in your DNA. But when the testing company analyzes your data at each of the colored locations, the words have the chance to be mixed up, as you can see in section B. 

Some mixups wouldn’t make all that much difference: Switching the words favorite and best doesn’t significantly impact the meaning of either sentence. But what if we switched some other words, as in section C? The new sentence makes a big difference, especially to the mom. DNA testing companies do have double-checks in place to help prevent this situation, but mistakes occasionally happen. These errors don’t appear in close relationships, though.

When something doesn’t make sense like this, you can always ask for help in the Ancestry Support Center. Click Support Center at the bottom of the AncestryDNA site, then DNA.

A version of this Q&A appeared in the May/June 2017 Family Tree Magazine.

Surnames “Missing” From Matches

Q: I am really puzzled. My father submitted his DNA to Ancestry, and I did too. I have many shared matches with him. But, my mother is deceased so there is no DNA from her. I have many DNA matches from her maternal side, but I am not finding one person with her father’s surname of Forbish. Does this mean he was not her biological father? Thank you for any light you can shed on this predicament.

A: Many genealogists are taking ahold of the idea that testing more known family members gives you test results that are better able to help in solving family history questions. And while this is entirely true, it can sometimes just produce more data that we have to try to search through.

You are correct in that, as soon as you have one known family member tested, you have a clue that can help you identify at least which branch of your tree some of your unknown branches might belong to. We do this primarily by using the Shared Matches tool.

Let’s say your known first cousin, Ralph, has DNA tested. You and Ralph share paternal grandparents Marcus and Hilda. That means that anyone else who is sharing DNA with you and Ralph should also be related to Marcus and Hilda in some way. So you can go through your DNA match list and mark those particular matches as paternal side, even if you don’t quite know how they connect. It sounds like this is exactly what you have done with both your paternal and maternal side cousins who have tested.

My first follow-up question for a missing surname would be “Do you have any first cousins on your mom’s side tested?” If you do, then we can look at the total amount of shared DNA with that first cousin to make sure you are full first cousins, as opposed to half first cousins (which would indicate that your mom was just a half-sibling to your aunt or uncle). Without a direct test of your relationship like that, we can only be left with speculation.

However, we might be able to turn speculation into something more if you have a close match that you know is not related on your dad’s side (not sharing any DNA with your paternal cousins) and doesn’t seem to be related on your mom’s side (not sharing DNA with your known maternal cousins). If you have someone like that in your match list, it is time to investigate.

A close match, meaning a second cousin or closer, who doesn’t seem to match anyone else, could represent a great grandparent couple that was previously unknown to you.

If you do not have a match like this, but you still don’t see the missing surname in your match list, it could just be that no one from that branch of your tree has tested yet. This is often the case if your line has recently immigrated into the United States. Your best course of action moving forward is to directly test someone you know is related to this Forbish line, and then analyze the results.

Q&A last updated, October 2020.

Unexpected Relatives

Q: My DNA results say that a “relative” of mine isn’t actually related by blood. My parent/grandparent/sibling/aunt/uncle/cousin isn’t who I thought they were. What do I do now?

A: I hear you. This situation can be even more alarming if you were the one who asked the relative to test in the first place. That is why I am constantly recommending that—before you ask your relative to test—you give them a quick primer on what they can expect, and ask for their preferences on how much they want to know about the results of the test.

In your quick primer on the possible outcomes of DNA testing, let them know that many people find unexpected results. This is everything from not having the Italian ethnicity percentage they expected to finding they have a half-sibling they did not know about. There’s also the possibility that they themselves do not biologically match their parents or siblings.

Sometimes we are so anxious to get that older uncle or cousin’s DNA into the database that we skip over these important details. We don’t need to scare them, but we do need to inform them. Simply saying something like “Hey Uncle Mike, I want you to take this DNA test so we can find out more about your great-grandfather. But along with that, we will be able to see your relationships to anyone else in the database who has taken a DNA test. This might mean we find relatives we don’t even know about yet.”

After your quick primer, ask Uncle Mike how much he wants to know about the outcome of your research. First, ask if he wants to know if you uncover anything about his great-grandfather. Then ask specifically if he wants to know if you find out anything unexpected about his family relationships. You may even want to have this in writing, so the whole family is clear about what Uncle Mike wants, should any disagreements arise.

Ifyou weren’t that proactive to find out what Uncle Mike wanted beforehand—and you find yourself with unexpected information about his connection to the family—it can be difficult to know how to proceed. And unfortunately, there are no clearly defined protocols here.

The very first thing you need to do is be absolutely certain you have interpreted the genetic data correctly. There is nothing worse than making assumptions and causing a hullabaloo only to discover that you were in error.

I learned from my dear friend Blaine Bettinger that, in this situation, there are four main characters:

  • The Discoverer (you)
  • The Subject (the person about whom a familial revelation was made; for example, Uncle Mike, if you discovered he is not the child of the man he grew up with)
  • The Secret Keeper (the person who likely knew about the discrepancy but said nothing; in this case, likely Uncle Mike’s mom)
  • The Affected (the rest of the family)

Whenever possible, you should allow the Secret Keeper to talk to The Subject directly. So, if your grandmother is available, you should approach her and allow her the opportunity to talk to Uncle Mike privately. If not, you are likely left to simply follow the Golden Rule and do unto others as you would want done for you. And certainly keep in mind that family is bigger than biology.

Q&A last updated, October 2020.

Thursday, March 3, 2022

GEDCOM Files: Sharing, Merging, Exporting and More

By Family Tree Editors Premium

Written by Rick Crume, unless otherwise noted

Jump to:

What is a GEDCOM file?
How to open a GEDCOM file
Sharing a GEDCOM file
Can you merge files?
Other merging software
7 Steps for Downloading a GEDCOM file from Ancestry.com
How to Export Your Family Tree GEDCOM Multimedia Files from RootsMagic
Related Reads

You’ve seen it mentioned on your favorite websites and in practically every issue of our magazine. Thousands of family historians use it to save and swap their data. But for many roots researchers, it’s one of genealogy’s enduring mysteries. We’re talking about GEDCOM, of course—that ubiquitous acronym for GEnealogical Data COMmunications, the standard computer file format family historians use to exchange information.

Though most people have little trouble using their genealogy software to enter data and print reports, handling GEDCOMs can be intimidating. Fear not: Our primer provides step-by-step instructions for creating and using GEDCOM files.

We’ve explained what GEDCOM stands for—but what does it mean for your family history research?

If you think of computer file formats as languages, GEDCOM is the one that all genealogy software “speaks.” Each family tree program has its own default file format (called a proprietary format), which other software usually can’t “translate.” But every program can read and write GEDCOM files, too.

That means you can share your family information with your relatives, even if you use different programs. You also can contribute your work to online databases such as FamilySearch Memories, or download a fellow researcher’s data and add it to your own family file—without retyping anything.

The catch: Because those proprietary formats treat information differently than GEDCOM does, data doesn’t transfer perfectly. Some genealogy programs read Family Tree Maker (FTM), Personal Ancestral File (PAF) and other file formats directly—no GEDCOM conversion required. That can save time and produce more accurate results, so see if your software offers this option before using a GEDCOM file.

What is a GEDCOM file?

A: GEDCOM is a computer file format that lets genealogists swap information about their ancestors. The format’s compatible with all genealogy software, so no matter what program you use, you can open GEDCOMs created with another program — and other researchers can open your files.

You don’t have to buy a GEDCOM, but you do need a genealogy program to create or open one. You can’t use GEDCOMs in other types of software, such as word processors (Word) or web browsers (Google Chrome). You can get a GEDCOM file several ways:

  1. Create a GEDCOM file of your family data using genealogy software (this is the only way to get a GEDCOM file from your own family tree information). The process is easy, but varies slightly depending on your software. In general, you’d open up the program and pick Export GEDCOM (or a similar command) from a menu. Then you’d click through a few dialog boxes that ask you questions or give instructions.
  2. Download someone else’s GEDCOM file from the Internet. Genealogists post their GEDCOMs on websites such as RootsWeb WorldConnect. You can search these sites to find a match for one of your ancestors, and if you do, you can download the GEDCOM — with all the family information in the file; not just on the one matching person — to your computer. Then you’d use your genealogy software to “merge” the data from the GEDCOM into your own family file (after verifying it, of course).
  3. Share a GEDCOM file the same way you’d share any computer file — for example, by e-mailing it or saving it to a disk.

Answer provided by Allison Dolan, from the December 2004 issue of Family Tree Magazine.

Return to top

How to open a GEDCOM file

Opening a GEDCOM file is simple. In Windows, just double-click on the file (GEDCOMs have the file extension .ged, as in smith.ged), and it should open with your genealogy software. Accept the default file name and location, and your program will “import” the file—basically, it creates a copy of the GEDCOM file in your software’s proprietary format.

Return to top

Sharing a GEDCOM file

Just follow these 7 steps to share your GEDCOM file:

1. Locate the file.

Once you’ve downloaded a GEDCOM file or received one as an e-mail attachment, note its location on your computer’s hard drive or removable drive. You might want to save all your GEDCOM files in a folder named GEDCOM.

2. “Stamp” the records.

RootsMagic and Legacy Family Tree let you add a source (a person’s name, address and email address) to each fact in an incoming GEDCOM file so you know where the information came from. If you use a different program, Progeny Software’s GEDmark can mark the source information on each record in the GEDCOM file before you import it into your family file.

3. Select the file.

Start your genealogy software and select File>Import File. Locate and select the GEDCOM file, then click OK.

4. Import the file.

Most programs will now ask you if you want to add the data to your existing file or create a new one. We recommend viewing the new data in a separate file before adding it to your existing family file.

If the GEDCOM’s creator attached pictures, sound or video, you’ll have an extra step: Copy the picture files to your computer and make sure the links in your new family file still point to the pictures. Suppose the sender kept the images on drive C in a folder called Genealogy Pictures within the My Pictures folder. The links should work if you keep the pictures in an identically named folder at the same location.

Then it will ask if you want to change the paths to all the multimedia links in the file to the new path you specified. Answer “yes.” As long as you kept all the images in the same folder, the links will be updated correctly.

7. For Family Tree Maker users, it’s better to share FTM files, not GEDCOMs

Family Tree Maker’s GEDCOMs don’t include multimedia links, and FTM can’t import the multimedia links in GEDCOM files created with other programs. But FTM does store multimedia files—not just links—within its own format. So if you’re sharing a file with another FTM user, it’s better to exchange FTM files, not GEDCOMs.

Return to top

Can you merge files?

When you add a GEDCOM file from another researcher or from a pedigree database, you may end up with duplicate records for the same person. One record might show the person’s descendants and the other his or her ancestors, for instance. By merging those duplicate records, you’ll create a continuous family line from the person’s descendants to his or her ancestors. And as your family file grows, eliminating duplicate entries will help cut down on confusion.

Merging duplicate GEDCOM files in Family Tree Maker

From the People pull-down menu in Family Tree Maker (FTM), you can choose from two merge options: Use Merge Specific Individuals if you already know which individuals should be merged. Or select Merge Duplicate Individuals and the program will search for possible duplicates. Bypass the somewhat confusing Display Merge Report and go ahead and Merge Matching Information. FTM automatically finds pairs of potentially identical individuals, displays their information side by side and lets you choose which pairs to merge.

Keep in mind that if you merge two individuals with conflicting information (different birth dates or places of death, for example), the information from both individual records will usually be retained as alternate facts. A few facts, such as name, sex, address and phone number, don’t store alternates, however. Buttons appear next to these facts when they conflict so you can choose which version you want to keep.

After comparing the information for both names, click on either the Merge or Don’t Merge button and continue through the list of possible matches. If you make a mistake, you can undo all the merges at any time before you exit the program by selecting Undo File Merge from FTM’s Edit menu. When you finish merging, you may want to edit the individual records that you just merged and delete any incorrect facts. From the View menu, select Reports, then Alternate Facts to get a list of people who have conflicting facts.

Merging duplicate individuals manually

You can merge duplicate individuals manually in Generations, but the process goes much quicker with the program’s Match and Merge function. Select Match Merge from the Find pull-down menu in EasyTree. This option lets you find matches for the couple on the screen, marked people or everybody; you can then compare those matches with just marked people or every name in your file. You can also search on identical or similar names and specify the range of birth and death years for qualifying matches.

Click Match and the program will display a list of names at the top. When you click on a name, possible matches appear below. Three columns show each person’s date and place of birth and date of death, but you can click on the column headings to compare any piece of information, such as occupation, religion or burial place. Select the names you want to merge from the top and bottom portions of the screen, then click on Merge to combine the two records. No events, facts or notes are lost. For example, if one record has a birth date of Feb. 14, 1892, and the other one has a birth date of Feb. 14, 1894, the newly merged record will have separate birth fields for both dates. Once you’re done merging records, you may want to edit them to delete events or facts you know are wrong.

Return to top

Other merging software

The internet has made swapping family tree files a snap. In fact, at sites such as WorldConnect and FamilySearch, it’s possible to add several generations to your pedigree just by downloading a few GEDCOM files (the universal family tree file format). The downside of internet genealogy is having to figure out which people in those GEDCOM files (if any) are actually related to you. Yes, the names may be the same, but names alone don’t make a match.

Before entering that data directly into your master file, it’s important to double-check it. But what’s a genealogist to do with a file containing hundreds of names? Enter two new programs designed to deal with that problem.

GENMatcher

This Windows-based program from MudCreek software quickly compares two files for matches, or searches one file for duplicates. It can compare GEDCOMs as well as files generated by Personal Ancestral File, The Master Genealogist, Legacy Family Tree and Family Tree Maker. This makes the program especially useful if, say, you want to compare your Family Tree Maker file to your cousin’s Legacy file.

After you select two files for comparison, the program starts making matches. For each possible match, GENMatcher displays both files’ data on that ancestor side by side. Thanks to color-coding (which you can customize), it’s easy to see at a glance which items match up perfectly and which need further investigation—matches appear green, and nonmatches appear pale yellow.

If you’re not confident about a match, click on the Family, Pedigree and Descendants tabs. These views provide details on an individual’s spouse(s), children and ancestors, so you can make sure you have the right person.

Saving your GEDCOM file as a PDF

Want to print the results of your comparison before adding the new data to your master file? Use the Reports feature (under the File menu) to create a summary. To read the report later, save it as a PDF, HTML, Rich Text Format (RTF) or graphic file.

GENMatcher’s user-friendly interface and practical application make it an excellent choice for any genealogist. Not only is it simple to use, it’s a real timesaver, particularly for people who do a lot of file sharing.

You can download GENMatcher for mudcreek.ca/genmatcher.htm.

GenMerge

This program from Pleiades Software Development takes file matching a step further by comparing data from multiple GEDCOM files and then merging the data into a new GEDCOM file. (It also eliminates duplicates in a single file.) In minutes, GenMerge can process up to 200,000 individuals at a time.

Although most full-fledged genealogy programs have a merge function, GenMerge goes a step further: It uses a record-linking method that compares not only an ancestor’s personal data, but also his family’s data, which helps to ensure accuracy. GenMerge even analyzes the people in your file with only a first or last name.

Unlike GENMatcher, GenMerge doesn’t color-code results, so the data’s harder to read at a glance. But the program does offer statistical reports with amazing depth. Before merging your GEDCOMs, GenMerge scours each file for duplicates and inconsistencies. It then generates a series of reports detailing the analysis. Because GenMerge doesn’t change your original files, you can make necessary corrections, then run the program again, review the results and (if needed) make further changes.

Once the files are clean, you can instruct the program to merge them. When it’s done, GenMerge will generate the same set of reports, so you can see the additions to your “main” file—a copy of your master file—as well as high-scoring failures (people who look like they should merge, but have conflicting parent or grandparent data). If you find problems with your data, just fix the master file and try again.

GenMerge can save hours of time you’d otherwise spend poring over potential matches and manually updating files. Once you’re happy with the GEDCOM created by GenMerge, you can make it your new master file. (I recommend keeping the old master file as a backup, just in case.)

You can download GenMerge from www.genmerge.com.

Nancy Hendrickson

See? GEDCOMs aren’t really that mystifying, after all. Once you’ve mastered these steps, you’ll become a GEDCOM guru—and be able to concentrate on solving your enduring research mysteries.

A version of this article appeared in the August 2005 issue of Family Tree Magazine.

Monday, February 28, 2022

DNA Q&A: What’s the Big Y-700 Test? Should I Choose a Y-DNA Test?

By Diahan Southard

Q: What is the Big Y-700 test offered by Family Tree DNA? Do I need it?

A: In January 2019, Family Tree DNA (FTDNA) announced the Big Y-700 test, a new upgrade to its Big Y test. As the name suggests, the Big Y test examines DNA on the Y chromosome, which only men have. You can use Y-DNA to sort out genealogical problems in your paternal line or involving surnames (since surnames follow paternal lines in most cultures). For example, Y-DNA can help you determine if two men with the same (or similar) surname share the same male common ancestor.

The Big Y-700 actually includes two tests: one that can help make more distant ancestral connections, and one that helps with more recent connections. These tests correspond to two different kinds of DNA markers, called STRs and SNPs:

  • Short tandem repeats (STRs) are repeated sections in DNA that can vary between populations and generations. This variation makes STRs ideal for determining closer relationships—perhaps within 10 generations or so. The “700” part of the test refers to the 700 STRs that are tested, an upgrade from the 500 offered by FTDNA’s earlier “Big Y-500 test.” (Family Tree DNA also offers less-expensive tests that examine 37, 67 and 111 STR markers, respectively.)
  • Single nucleotide polymorphisms (SNPs) are single changes in the DNA. Some of these SNPs have a very slow rate of change (think tens of thousands of years!), while others change much faster. This steady nature of many SNPs allows scientists and genealogists to learn about human migration and the relationships of their own distant ancestors.

Benefits of the Big Y

The Big Y really shines because of its SNP analysis and exploratory nature. Other SNP tests, like the ones used to test our autosomal DNA, are like planned tours of your chromosomes. Each of these tours examines a designated 700,000 or so stops along the chromosome. If you are traveling along chromosome 7 and see something interesting a ways off the path—too bad! You can’t stop!

But the Big Y is like a jungle safari. You have a guide, but you can explore interesting trails you come across and generally deviate from the planned course anytime you like.

This means the Big Y test will find unique Y-DNA variants that only your specific paternal line carries. Only men who share a direct paternal line with you (perhaps 10 to 20 generations) will share these SNPs with you. These SNPs help fill the gap between what the STRs can tell you (about 10 generations back) and the oral histories or genealogy you have stretching (at best, back to the 1400s or so). On average, the Big Y test will find about 70,000 SNPs on your Y chromosome that make up your Y-DNA signature.

Do I need the Big Y-700 test?

Well, that depends. The Big Y-700 test is most valuable for individuals who have solid paper trails and traditional Y-DNA testing that matches others going back at least eight generations. It will help them find connections with men who may connect to them around that 12-to-15-generation mark before surnames existed to guide us. The “700” part of the test could provide greater definition between the lines they already know are related. Many related lines have zero or just a few differences at the 111-marker level—great for determining relatedness, but terrible if you want to figure out which of four brothers was your ancestor. The Big Y-700 test could find those differences.

Q: I’m trying to decide between autosomal DNA and Y-DNA for my paternal uncle. The line has been traced back to Nova Scotia for a number of generations, and I’m trying to go further back to find the original immigrant. Which test should I use?

A: While autosomal DNA testing is valuable and has helped countless genealogists find their families, it has two glaring flaws: It’s shortsighted and it’s blurry.

To the first point, your autosomal DNA can help with only about five or six generations of your family tree. You do have autosomal DNA from your eighth-great-grandfather, but it’s in tiny pieces. Current tests can’t use such small pieces to tell if you match someone else because you share an eighth-great-grandfather, or you both just came from the same population group.

Autosomal DNA testing is blurry because it doesn’t give you a clear picture of how you’re related to someone. Based on how much DNA you share, you might be estimated as third cousins. But you also could be fourth cousins, third cousins once removed, second cousins twice removed, or another relationship that shares about the same amount of DNA. Without some legwork, you won’t even know if the match is on your paternal or maternal side.

Y-DNA, on the other hand, has both vision and relative clarity. Your uncle’s Y-DNA has been passed down basically unchanged through generations of fathers, and therefore represents a near-perfect record of his eighth-great-grandfather on his direct paternal line. (Women don’t inherit Y-DNA.) Furthermore, when you find a match in a Y-DNA database, there’s no doubt that you share a direct paternal line with that match. You might not know in which generation you connect, but you’ll have a range of a few generations to start your search.

Since you’ve already traced your ancestry back several generations, you’ll probably want to have your uncle take the Y-DNA test—so long as he’s descended through male lines from the immigrant you’re interested in. The best-case scenario is that your uncle’s Y-DNA will match someone who knows more than you do about the family’s origins. Y-DNA testing is more expensive than autosomal, but it’s also worth it. You can start with the Y-DNA 37-marker test at Family Tree DNA for $169, and if you want, upgrade to a higher level of testing later without having to submit a new sample.

A version of this article appeared in the December 2018 issue of Family Tree Magazine.

Thursday, February 24, 2022

How to Use Online Sanborn Maps for Genealogy

By Diane Haddad
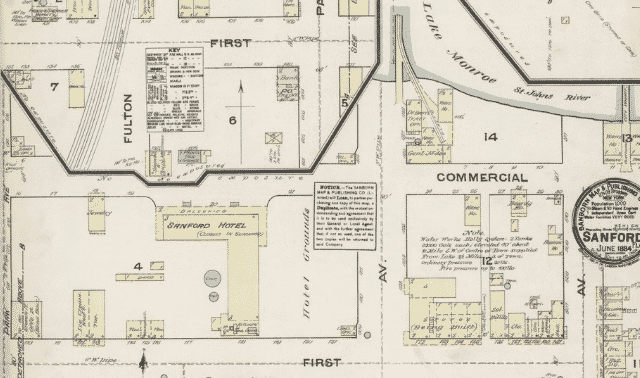
(1884) Sanborn Fire Insurance Map from Sanford, Seminole County, Florida. Sanborn Map Company, Jun. [Map] Retrieved from the Library of Congress.

Have you heard about the Library of Congress’ digital Sanborn maps? Nearly 25,000 maps are online, with more to be added over the next three years, for a total of 500,000.

Sanborn fire insurance maps were published for insurance companies to assess a structure’s risk of catching fire. They were published in different years for different places, and usually after 1920, a set of maps for a particular town might be updated by pasting over a new building.

The maps show subdivision names, streets, buildings, and building details such as address, purpose, composition, windows and doors. You can locate your ancestor’s address before renumbering and renaming that might’ve happened, and you get a good look at your ancestor’s neighborhood at the time.

Here’s an example of how I used the collection to see where my ancestors lived:

1. Search for city maps

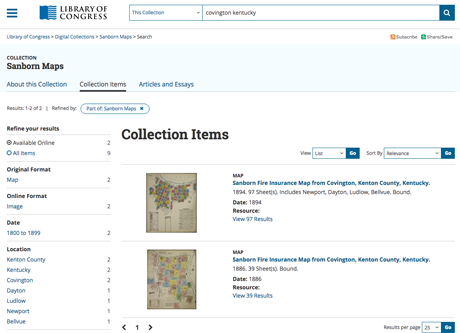
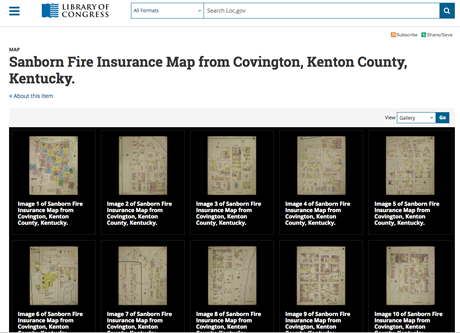
Much of my mom’s family lived in Covington, Ky., so that’s what I searched for (typing the full state name) in the Search box at the top of the page. Maps were published in 1886 and 1894 (I chose 1886).

Searching the LOC's collection of online Sanborn maps.
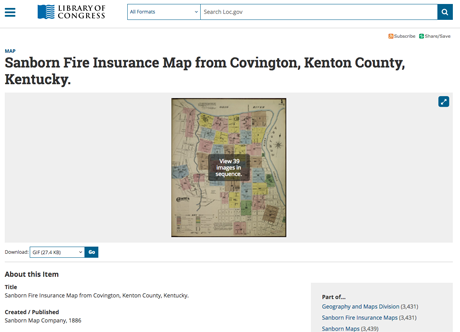
A Sanborn map for Covington, Kentucky.

2. Use city directories to find specific addresses

Next, I looked up a few ancestors’ addresses in city directories. In 1886, Louis Thoss lived and worked at a hardware business at 73 E. 12th st. His mother, Elizabeth, was a widow at the southeast corner (“sec”) of 13th and Garrard. His deceased brother’s widow, Jennie, lived at 165 E. 13th.

3. Explore indexes

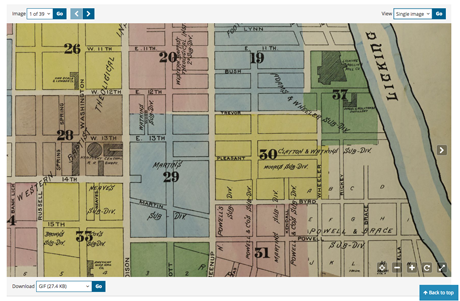
Zooming in on the index to see individual street names.

Zoom in on the index map and drag it around to get a better look at street names.

For larger cities, check the last page in the series for a street index that lists which range of house numbers and the map page they’re located on. It also lists “specials,” or major buildings.

The corner of East 13th and Garrard is on Map 30. Jennie’s address on East 13th could be on map 29 or 30.

Narrowing in on individual houses.

I Googled Louis’ address to get a better idea of its location today. It’s probably on Map 20, but might be on a different map if houses have been renumbered since Louis’ day.

4. View singe images or galleries

At the top right of the web page, switching from single image to gallery view and clicking Go gets me to the view of all map pages in this set, so I can find and click image 30.

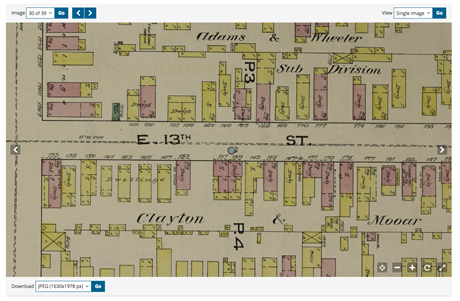
Here’s where it helps to check a Google map if you don’t know the area. Thirteenth street was shown running north/south, because it was probably positioned horizontally on the page. But in real life, it runs east/west. If I didn’t know that, I’d pick the wrong corner of 13th and Garrard. You can rotate the map using controls in the lower right corner.

Elizabeth Thoss lived at No. 133. No. 165 is 11 doors to the east.

Using Sanborn maps to research ancestral neighborhoods.

5. Learn from colors and symbols

Elizabeth’s home is mostly pink and some yellow, with numbers and Xs, and the notation “no opgs” on the side. You’ll find a key on the index map page and more information about the colors and symbols here, along with notes such as the area’s population and size of the fire department.

Colors indicate construction materials. Green indicated a high-risk building. The numbers tell how many stories. An X marks a door, and Xes on walls mark windows, with dots for windows on second or higher stories. An O is an iron chimney. Elizabeth’s building was mostly brick (pink) and 2-½ stories, with a 2-story wood (yellow) addition. The front section held a saloon (“sal”), with a dwelling (“Dwg”) in the rear.

6. Download maps for future research

You can download this map in several formats, all the way up to a TIF, using the Download menu at the lower left.

If you’re looking in New York City, you can use the New York Public Library’s Map Warper to view Sanborn and other old maps layered over modern maps. If not, you can upload your map to Google Earth and do an overlay there. Find a tutorial in the July/August 2015 issue of Family Tree Magazine.

Monday, February 21, 2022

The Best Way to Safely Label Photos

By Maureen A. Taylor

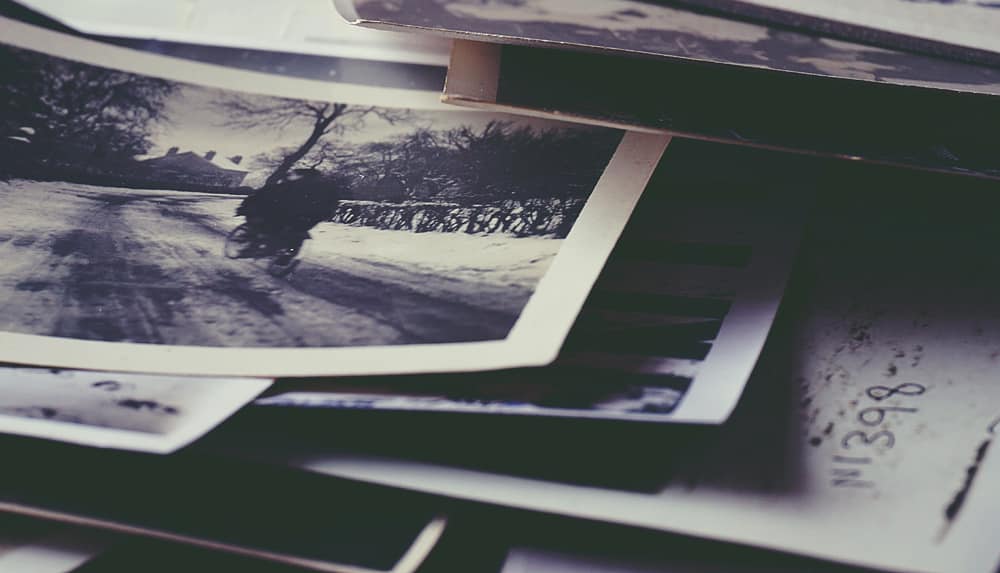
We tend to assume that future generations will always know who people are in photos, but (as you may have learned) that’s not always the case. So it’s important to understand how to safely label photos to preserve the information in them.

This is a common problem for our readers. One wrote in that, “Before I knew any better, all my family photos are marked on the back in ballpoint pen. Will this damage them? Will the ink eventually seep through? I now have an archival marker for pictures going forward.” Another wrote: “It seems that all the articles about photo restoration say not to write on the back of photos with anything other than a soft-lead pencil. Several years ago, I wrote names, etc. on the back of some of my photos using a waterproof and permanent ink marker that I purchased at a photography store. The pictures are still in perfect condition today. Is there any reason I shouldn’t be using this marking pen?”

Both of these questions address a similar issue: How do you safely label photos to identify information in them for future generations? Photo-safe products on the market can help you—as can these three tips for marking photos.

Is your collection of family photos less than picture-perfect? Turn your piles of pictures into a model of photo organization in eight steps.

1. Write on back of photo using a soft lead pencil

If you can, use a soft lead pencil to write information—including who’s in a photo, the date it was taken, the occasion, and where it was taken—on the back of a photograph (where the information will never become separated from the image). Soft lead is important because hard lead pencils will leave an indentation. Place the photo face down on a clean, dry surface and write with light pressure.

Consider writing some of the following details on the back of the photo:

  • name(s) of the individual(s) pictured, as well as their birth or death dates
  • when and where the photo was taken
  • where you found the original image, or who has/had custody of the image

2. Use soft-tip markers for photos with coating

Unfortunately, pencils won’t work on the coated papers used for today’s photographs. Instead, purchase an odorless (when dry), waterproof, soft-tip marker. Just be careful to let the ink dry completely before you stack or store the image, because it is permanent.

Ballpoint pens and regular felt-tip markers are not good choices for labeling photos: Ballpoint pens smudge and leave indentations in the photograph, and felt tip markers can bleed through the image. The good news is there are lots of choices for safe labeling tools in art supply stores and craft shops.

3. Scan photos that have damage

Time can take a toll on old photographs. From humidity to water damage, here are our tips for how to fix your damaged family photos.

If you have photographs marked with ballpoint pens, any damage is already done. Previous generations didn’t have access to the photo-safe tools we have today. Don’t worry too much about it. You can scan the photos to preserve the image and digitally repair ink smudges, and make sure that you use appropriate products when identifying your photographs.

Learn how to organize your genealogy files on your computer with these practical tips for naming, managing and sorting digital documents and photos.

Last updated, May 2020

Thursday, February 17, 2022

1850 Census Records Research Guide

By Family Tree Editors

Table of Contents

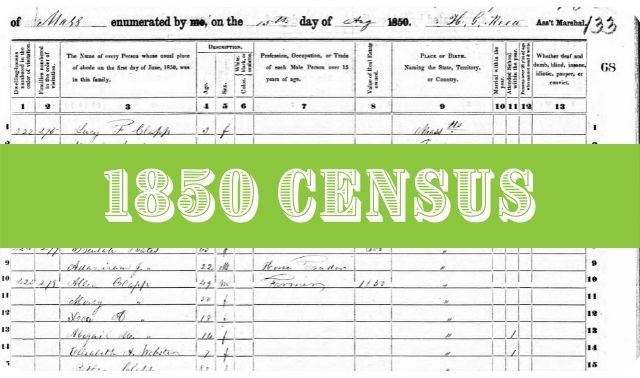
Genealogists might think of this as the “hallelujah!” census. Not only was each free person in the household finally listed by name, but specific ages (as of June 1) replaced those frustrating ranges. Other questions covered sex, color, .” This was the first census to have separate schedules for slaves and for people who’d died in the year prior to the census (called mortality schedules; they also exist for the 1860, 1870 and 1880 censuses).

David Fryxell, “US Census Information Year-by-Year for Genealogists

Deep-dive into US census records and other population counts. From helpful research resources to clues about solving ancestor mysteries, our experts provide solutions to your toughest census conundrums.
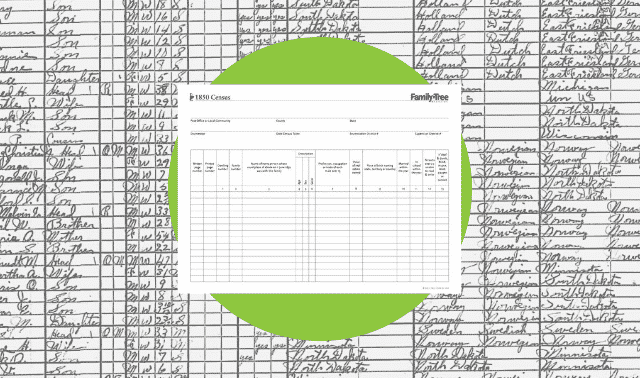
Get a free downloadable form to organize and record your family history discoveries from the 1850 US Census.

1850 Census Fast Facts

OFFICIAL
DATE

June 1

NUMBER OF
QUESTIONS

13

NUMBER OF
STATES

30

DECENNIAL
CENSUS NUMBER

7th

NOTABLE
QUESTIONS

Birthplace (state or territory)
Occupation
Value of real estate
Whether married within the year
Attending school within the year
Illiteracy
“Deaf & dumb, blind, insane, idiot, pauper or convict”

10 LARGEST CITIES

New York City, NY
Baltimore, MD
Boston, MA
Philadelphia, PA
New Orleans, LA
Cincinnati, OH
Brooklyn, NY
St. Louis, MO
Spring Garden District, PA
Albany, NY

Return to top

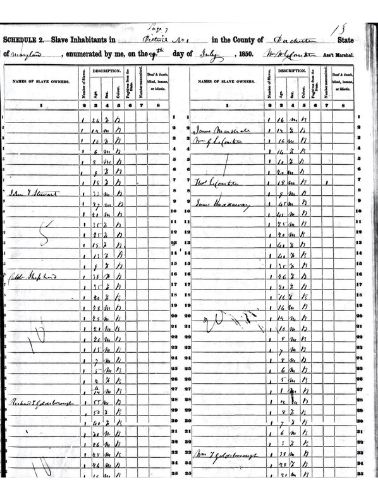
1850 Census Form Images

United States Census Bureau
(click here to view larger and download)

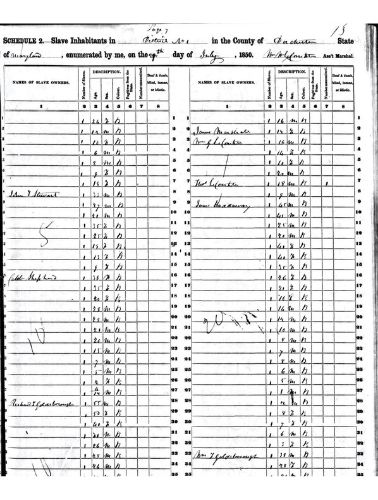
Slave Schedule

United States Census Bureau
(click here to view larger and download)

Return to top

1850 Census Questions

Free Inhabitants

  1. Number of dwelling house (in order visited)
  2. Number of family (in order visited)
  3. Name
  4. Age
  5. Sex
  6. Color: This column was to be left blank if a person was White, marked “B” if a person was Black, and marked “M” if a person was Mulatto.
  7. Profession, occupation, or trade of each person over 15 years of age
  8. Value of real estate owned by person
  9. Place of Birth: If a person was born in the United States, the enumerator was to enter the state they were born in. If the person was born outside of the United States, the enumerator was to enter their native country.
  10. Was the person married within the last year?
  11. Was the person at school within the last year?
  12. If this person was over 20 years of age, could they not read and write?
  13. Is the person “deaf, dumb, blind, insane, idiotic, pauper, or convict?”

Slave Inhabitants

Slaves were listed by owner, not individually.

  1. Name of owner
  2. Number of slave: Each owner’s slave was only assigned a number, not a name. Numbering restarted with each new owner
  3. Age
  4. Sex
  5. Color: This column was to be marked with a “B” if the slave was Black and an “M” if they were Mulatto.
  6. Listed in the same row as the owner, the number of uncaught escaped slaves in the past year
  7. Listed in the same row as the owner, the number of slaves freed from bondage in the past year
  8. Is the slave “deaf and dumb, blind, insane, or idiotic?”

United States Census Bureau, Index of Questions: 1850

Return to top

Where can I find the 1850 census?

Return to top

How to Read the 1850 Census

Answers abound in the 1850 census, some of them reaching back to resolve mysteries from earlier enumerations. Here’s Mary Clough, living with her daughter in Ouachita County, Ark., of all places, age 84, born in North Carolina. So not only is my 1766 birth date vindicated, but I can now start looking for Mary’s elusive parents in North Carolina. The 1850 census has given me clues to an event more than 80 years earlier.

David Fryxell, “US Census Information Year-by-Year for Genealogists

Return to top

1850 Census Research Resources

Websites

Census.gov
1850 Fast Facts
1850 Overview
1850 Index of Questions

Cyndi’s List
1850 U.S. Federal Census Online Records and Indexes

FamilySearch Wiki
United States Census 1850

RootsWeb
1850 U.S. Census

How to Read and Understand Marriage Bonds

By George G. Morgan
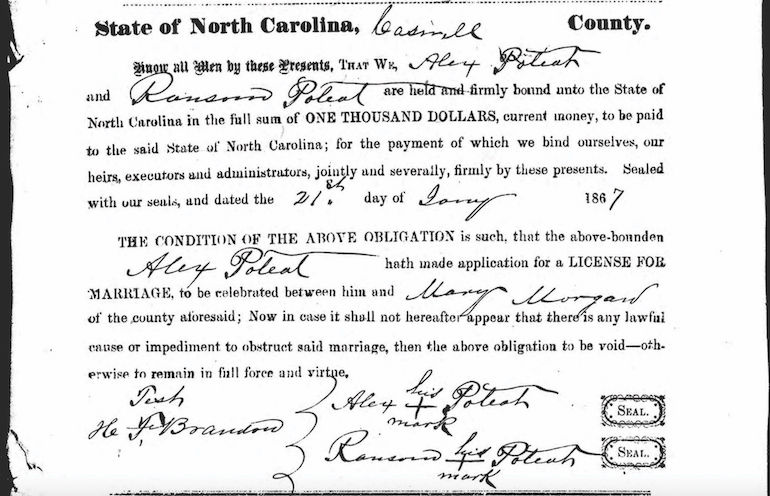
A marriage bond filed in North Carolina. Click on the image to see a larger view.

Marriage bonds are separate documents from marriage licenses, and can contain new clues to use in researching your ancestors. Here’s what to look for.

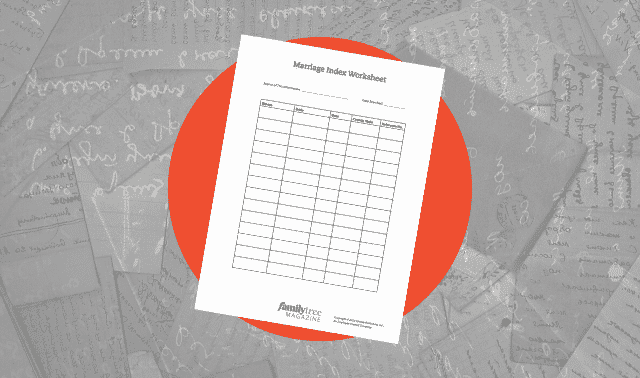
Celebrate your ancestors’ love by recording the day they started a life together on this free marriage index worksheet.

1. Bonds vs. licenses

A man would file a marriage bond to legally affirm his intention to marry a particular woman and confirm there was no legal impediment to the marriage. Don’t confuse it with a marriage license, or with a marriage contract the parties might have agreed to.

2. Naming a location

Caswell County, NC, where this bond was filed in court, is where the marriage is planned to occur. Use this place to launch your search for all the people named in censuses and other records.

3. Those named

The document names the bond applicant, the groom and others committing themselves to the bond. Cosigners often are relatives, as suggested by the common last name of these men. Seek other records that may connect them.

4. A fine for unlawful marriage

This bond obligates the prospective groom and any cosigners to pay a $1,000 fine to the state if the marriage occurs but was illicit for some reason (such as the groom or bride already being married to someone else).

5. Differing dates

The dates of the bond and marriage are usually different. This bond is dated Jan. 21, 1867 (the marriage license was issued at the same time). The marriage took place on Jan. 25. Enter the bond and ceremony dates as separate events in your family tree.

6. Research the clues

Research the names of any witnesses for possible connections.

Tuesday, February 15, 2022

5 Essential Elements of a Genealogy Source Citation

By Shannon Combs Bennett

While you’ll hear plenty of suggestions on how you should do a source citation, there is not a true wrong way or right way. Elizabeth Shown Mills says that, “citation is an art, not a science,” and she is correct. It comes down to adhering to the essential components of a citation, listed below. Once you have these down, you will be comfortable enough to cite just about any record you come across.

Essential elements of a good genealogy source citation

There are five key elements to a successful source citation. If you have these in your citation, you will be good to go with only a few exceptions. These elements are:

  • Who created the information (author, editor, transcriber, etc.)
  • What is the title of the source
  • When the record was created or published
  • Where in the record the information is located (volume, page, etc.)
  • Where is the source physically located (archive, library, etc.)

Let’s break this down a bit and further define each component.

Who created the source?

“Who” specifically refers to the author or creator of the source. It may be a person(s) or it could be an organization. So, for example, if you’re citing a letter you found at home from your great-grandfather to your great-grandmother, then you’ll want to cite your great-grandfather as the “who.” If, however, you’re citing a book that contains the letter you’re referencing, the “who” in the source is the author or editor who compiled the information.

There are two reasons you wouldn’t list a “who.”

  • If the author or creator is not on record. For example, you may not know the writer of a historic newspaper article, which typically did not list writer’s names.
  • If it is the same entity that published the item and the “who” is also the title of the work.

What is the source?

The “What” is the title of the source. Remember to follow the rules of underlining or italicizing the title and use title case. However, if the item does not have a title, you’ll want to create a description for it. The description lets others know exactly what the material is. For example, “Letter written by John Doe to his wife Jane.” If you think the title doesn’t make it clear what type of a source it is, you can add descriptive words after it, such as database, transcript, image, etc.

When was it published?

“When” refers to the date the media was published. Use years for books. Months, quarters or seasons are added for journals and magazines. Use full dates for newspapers, downloads of online information and unpublished sources, if applicable. If the item is not dated, state that by using the letters ND for “no date.” However, if you can estimate a publication date then try to do so. Show the estimated date range or write “likely the 1880s.”

Where in the source citation?

“Where in” refers to the specific place in the source where the information is located. This is a page number, volume number, chapter title, etc. If the record is an unbound source or has no page numbers, you can identify the information on the page you are citing by describing it. For instance, “birth dates chronologically listed on loose page in file.”

Where is the source located?

“Where is” refers to the specific physical location of the source. Did you find it online, in a library, at an archive, or is it held privately? This can get very complicated, but just remember this tip: Work from small to large. Start with the collection name (the smallest where) and work your way up to the state or country (the largest where) listing all the information about the location of the source as you go.

Source Citation Example

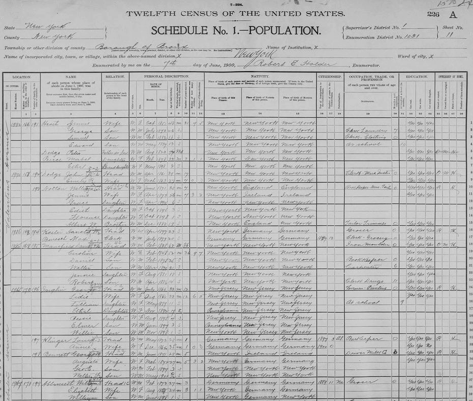
This is a page from a 1900 US federal census found online. To create the source citation, I need to gather pertinent information from this page and the website I used.

Source Citation 1900 Census Record
1900 US Federal Census

For most census citations you will need the information listed at the top of the page and in the first few left-hand columns. This information includes: where the census was taken, the page you found the information on, where the family is located on the sheet, plus the numbers from the family, house and dwelling columns. You will also need the website name, URL address and the date you accessed this information. All of these pieces will go into your source citation.

Let’s walk through gathering the information:

  • Who: U.S. Census
  • When: the year taken (1900)
  • What: The description and type of census (New York County, New York, population schedule, Borough of the Bronx, p. 11A (written), dwelling 170, family 198, George Bennett family)
  • Where in: lists the original repository that the image is located in. (citing FHL microfilm: 1241126.)
  • Where is: the location on the website, with the date accessed. (digital image, Ancestry.com (http://www.ancestry.com : accessed 8 Dec 2014))

From this breakdown you can create your source citation:

1900 U.S. Census, New York County, New York, population schedule, Borough of the Bronx, p. 11A (written), dwelling 170, family 198, George Bennett family; digital image, Ancestry.com (http://www.ancestry.com : accessed 8 Dec 2014); citing FHL microfilm: 1241126.

Thursday, February 10, 2022

How to Organize Your Family Keepsakes and Collections

By Denise May Levenick

When emptying my deceased aunt’s home to prepare it for sale, we didn’t have the time to go through all the contents of her closets and drawers. A brief look showed that over the years, important documents and photos had been layered with household receipts, brochures, junk mail, bill stubs and random bits of paper.

I transferred individual drawers to boxes and brought everything home to examine more closely. The first box I sorted showed me that this had been a wise decision. Mixed in with free notepads from the local realtor, I found two cabinet card photographs of my grandmother when she was an infant and toddler. These treasures could have been lost forever.

Lots of family archives are handed down in the same condition as my aunt’s: a mess of heirlooms, historical documents and, well, trash. When you’re the one in charge of dealing with the archive, it can be an overwhelming responsibility. You’ve just inherited a lifetime worth of stuff from a loved one (whom you may have recently lost). Now what do you do?

In my book How to Archive Family Keepsakes, I explain how you can organize, preserve and pass on what is meaningful and important—without letting inherited items take over your house and your life. Follow these steps to organize, manage and pass on your family archive.

1. Keep only what’s important

Receipts. Newspaper clippings. Old letters. Scrapbooks. Address books. All have one thing in common—they’re made from paper, in its many colors, shapes and sizes. If your inherited archive is free from paper trash, consider yourself lucky. I’ve worked with dozens of family collections and more than half contained moderate to extreme amounts of this type of trash. Why? Because paper is free or cheap, it comes to you, it has many worthwhile uses and, for many people, it’s hard to resist picking up that vacation pamphlet or restaurant take-out menu.

But all that paper can be too much. Saving vital information is one thing, but saving an entire lifetime of cancelled checks is quite another. As family curators, we might have just a teeny-bit of hoarding tendencies in our own DNA. We find value in anything our ancestors might have touched.

Be strong. You don’t want to end up on reality television with your closets and cabinets thrown open to the world. When it comes to paper, you can feel just fine about throwing away quite a bit—even if it came from Great-aunt Helen’s desk drawer. As you begin to sort and organize your archive, ask yourself: Is this item worth the time and the cost of archival storage supplies to be part of my archive?

I suggest you evaluate the materials and categorize them as:

Vital

The paper gives genealogical information or other key information about a person, place or event in your family; or it confirms or refutes family tradition. Photos, letters, vital records, military discharge papers and the like fit this description.

Be prepared to find photos and film anywhere and everywhere. I’ve found old photos inside books, tucked in letters, curled inside a vase, tacked to the back of a picture frame and underneath dresser drawer paper lining. Wallet-size photos might be in wallets or purses. Tiny photos were often trimmed for jewelry. Cased photographs such as daguerreotypes might be mixed in with books or other artifacts. Look everywhere and bring the photos you find to one place where you can evaluate their conditions and arrange them for storage. Handle these items with care and conservation.

Adds color

This paper adds color and interesting information about a person, place or event in your family. You might classify a bulletin from your ancestors’ church or brochure about their favorite vacation spot in this category.
Store these items either with the “vital” items, or move them to their own archival box. Digitize them as needed, and see to their archival storage needs only after the vital items are taken care of. If the information on a paper is more useful than the actual piece of paper, consider saving the digital copy and discarding the paper.

Not archival

If a paper—such as a receipt, bill stub or unintelligible notes—doesn’t add personal information, don’t bother saving it in your family archive. Just because a loved one kept it, doesn’t mean you have to. In particular, isolate anything made of newsprint or cheap-grade, acidic paper. It’s not worth damaging your grandfather’s last will and testament by stacking it with a crumbling cleaning receipt.

If the information is of interest to only you, or you might need it for insurance or other purposes, keep it somewhere outside of the archive. For example, I have a small plastic shoebox filled with 1950s valentines, sweet bookmarks and other bits of ephemera that I use in handmade collage and greeting cards.

2. Preserve and protect

Review all the items in your archive box by box and consider giving your full attention and resources to only those items that really count. Take care of the vital stuff first. When you are tempted to save odd bits of cool ephemera, remember your original goal to preserve your family history.

Paper

You have several options for organizing the papers you decided to keep. You could sort them by the family member they’re associated with, by surname, by size or by type (such as vital records, military papers or school memorabilia). Depending on the size of your collection, you might be able to fit all your papers for one person or surname in a single folder, or you might need several folders.

As you work, carefully remove staples (use a pencil eraser to bend open the “arms,” then gently pry it out with a letter opener), paper clips or other metal. Remove twine or rubber bands and discard. Remove letters from envelopes and unfold them for flat storage, but leave any brittle papers folded—don’t force them open. Keep each letter with its own envelope, and keep collections of correspondence together.

Remove any newspaper clippings enclosed with letters, scan or photocopy the clipping to acid-free paper and include the copy with original documents. Keep the original newsprint clipping in separate storage.

One good way to store paper items is placing similar-size documents together in archival-quality file folders or paper sleeves. You can place the folders or sleeves flat in archival storage boxes or upright in hanging folders. It you choose the upright option, don’t allow papers to slump inside the folder. If you’re on a budget, you can use office-quality hanging folders as long as the documents are first placed inside archival-quality file folders.

Label each folder with the date and the name of the family or individuals associated with the document. To make items easier to find, number the folders and keep a list of what’s in each one. As you place each paper in its folder, consider scanning it to easily preserve and share the content.

Photos

There are many ways to organize your photos. After sorting through the collection, decide whether to organize photos by family, date, subject, event, place, photographer (for example, photos Mom took), size or type of image (such as daguerreotype, tintype, etc.).

Your storage strategy depends on the type of image you have. Don’t worry if you have difficulty determining whether your photos are daguerreotypes, tintypes or ambrotypes. The care for any cased image is the same: Store these in close-fitting individual photo storage envelopes or sleeves inside an archival box. It’s important that both the envelopes or sleeves and the box fit the photo snugly to prevent images from sliding and scratching.

Keep prints in sleeves or envelopes made of archival-grade paper or clear plastic. Store same-sized prints together, stacking them carefully to avoid scratching. Place rare prints in individual sleeves. Store these envelopes vertically in same-sized archival boxes.

Color photos are especially prone to fading when exposed to light, but even images stored in the dark may develop “color shift” and a yellowish haze. Fortunately, by scanning and digitally restoring old prints, you can bring back much of the original color. Store old prints in archival paper or plastic sleeves inside photo storage boxes. Keep these in a cool, dry place. The cooler your keep your photos, the longer they will last, but don’t refrigerate them or put them in the basement—humidity causes its own problems. A shelf in an interior closet in the living area of your home is best, and check the collection regularly for pests.

Cataloging your keepsakes

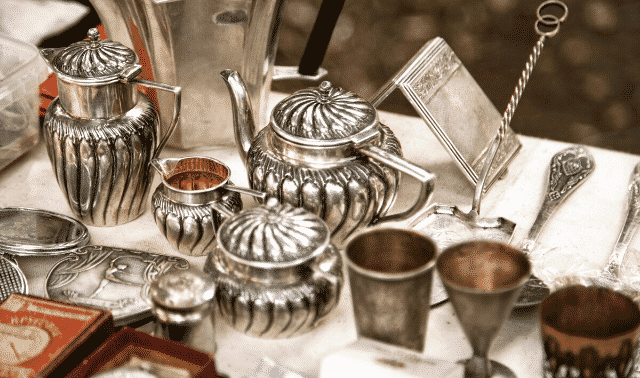
After your demise, will your family know the importance of that odd assortment of china you inherited from your grandmother? Or will they (gasp!) sell your precious family treasures at a garage sale? Telling family members the objects’ importance can’t hurt, but they might not remember the story you’ve told about each item. Instead, make an inventory of your family artifacts. For each keepsake, include details such as:

  • how it came into your possession
  • who owned it originally
  • when it was made
  • what family stories are associated with the heirloom

Keep this with your important papers.

You also might want to catalog heirlooms that aren’t in your possession, so you and future generations know family treasures’ whereabouts. You can start with the handy Heirloom Inventory and History form (a free download), or create your own inventory from scratch. For each item, include the relative’s name, contact information, a description of the object, the item’s history (who owned it originally, how it was passed down in the family, how the original owner got it) and stories associated with it. Next, photograph the objects from different angles and add the pictures to your inventory.

Here’s a sample from one family’s heirloom inventory:

Dark blue Stafforshire tea and coffee set, circa 1840. Set consists of a coffeepot, teapot, creamer, sugar bowl, and four cups and saucers. All but the sugar bowl and creamer, purchased at a later date, belonged to the family of Emma (Ludwig) Rhoads and were used at their farm at Yellow House, Pa. Present owner: [name and address].

You can even inventory missing family heirlooms. Make the descriptions as complete as possible:

Unfinished and unsigned needlework sampler, probably stitched by Ellen M. Lorah, daughter of Mary (Rhoads) Lorah, Broomfieldville, Berks Company, Pa., who attended the Linden Hail School for Girls in Lititz, Po., in 1860, when she was 16. Floral decorated, about 6 ×18 inches. Current owner. unknown.

Make at least two copies of your family history inventory and any pictures of heirlooms. Keep one copy with your genealogical files, and store another copy with your important papers, so it will stay in the family. If you have a family history Web site or publish a family newsletter, you might want to post the list of family heirlooms, especially if it includes unidentified or lost items.

Sharon DeBartolo Carmack, from the May 2004 issue of Preserving Family History.

3. Make homes for heirlooms

“Artifacts” doesn’t describe only objects excavated on an archeological dig. Curators and collectors use the term for the many manmade objects that acquire historical or artistic significance. For the family historian, artifacts may assume emotional and sentimental value, as well. Your great-grandfather’s pocket watch and your aunt’s Depression-era quilt are examples of the kind of artifacts you might find in your family archive.

Preserving inherited artifacts isn’t necessarily complicated, especially if the object is on display or used in your home. Some items need a bit of extra TLC, but most will likely be just fine with the same care and attention you give everything else in your home. If you’ll be storing the artifacts, take the standard precautions against extreme temperatures, humidity and pests.

No matter what type of artifact you’re handling, always wash your hands before touching it, and remove rings and bracelets to avoid nicking or snagging the item. Here’s how to store various artifacts:

  • Art: Museums recommend rotating displays of valuable pieces—six months on display, six months resting in storage—to prevent overexposure to light, dust and other environmental elements.
  • China and collectibles: Don’t wrap china in newspaper or acidic newsprint paper for long-term storage; this can cause discoloration. Use acid-free, lignin-free tissue instead. Keep breakables in sturdy, crush-resistant archival boxes.
  • Furniture: Spray furniture polish is convenient, but it’s a poor choice in caring for wood. Use a clean, slightly damp cloth instead, and try to keep pieces out of direct sunlight.
  • Musical instruments: Use a soft cloth to remove dust. Regularly playing an instrument is the best way to monitor its function and repair needs. Without proper maintenance, that violin or brass horn can easily lose its function to make music and become simply another interesting artifact.
  • Quilts and samplers: Roll large fabric items, such as quilts, around an archival tube to avoid creases. Cushion and protect the surface with archival tissue. Use a piece of clean washed muslin longer than the roll to form a protective outer layer: Roll the muslin around the item one and a half times, then tuck the ends into the ends of the tube. Gently tie cotton twill tape or muslin strips around the roll to secure.
  • Clothing: If it’s in good condition, launder clothing such as wedding dresses, uniforms and christening gowns after use and hang to store (consult a professional cleaner for antique or intricate items). To support the garment, wrap wooden hangers in polyester quilt batting covered with a muslin sleeve. Stuff archival tissue in sleeves and legs for additional support, and place the entire garment in a muslin garment bag of the same size as the item of clothing. Don’t use plastic or vinyl garment bags.
  • Military insignia and scouting memorabilia: Store protected with unbleached muslin or acid-free tissue inside archival boxes. For display, don’t use a wool backing—wool contains sulfur that will eventually damage medals. Cotton is a better option. Keep the display away from direct sunlight.

Just as you can scan photos and documents, you can use your digital camera to photograph family heirlooms. The photos would be a terrific addition to an inventory of the heirlooms in your possession (download an inventory form here).

Family archives are a great resource for family historians and a wonderful legacy to pass on to future generations. The time you spend organizing and preserving your archive will help you—and your family—take full advantage of all of the genealogical information and memories those old letters, photos and keepsakes hold.

Value Judgments for Heirlooms

What kind of value do your items have? Value is commonly understood as something’s merit, worth or importance with regard to money, history, culture, art or sentiment. The second half of the definition is often unstated, but it is essential in any evaluation of value.

Monetary Value

Monetary value refers to the price an item would bring on the open market, or its fair market value. Scarcity and condition play a large part, as does the current popularity of the item as a collectible. An appraiser can assess an item’s monetary value so you can have it insured.

Monetary value often is different from intrinsic value. Your family may place an intrinsic value of $500 on your grandmother’s crystal candy dish—that is, you wouldn’t consider selling it for anything less. But an appraiser may put the monetary value at $80 because it’s old but not rare, and that’s what similar dishes sell for on eBay. This also may be the insurance value of the candy dish and your tax deduction if you choose to donate it.

Historical and Cultural Value

Historical and cultural value is determined by events, people and places associated with an item. It may or may not carry a corresponding monetary value. Your grandmother’s diary, for example, may have little monetary value compared to its historical value as a window into the life of a WWI Army nurse.

Even so, museums seek out and purchase items for their collections, which helps establish the cash value for historical artifacts. The current black market in historical and cultural items has created an entire industry based on selling stolen and forged historical artifacts.

Artistic Value

Artistic value may be high if a piece shows skill in painting, sculpture or other media, but not all “good” art acquires a high monetary value. In general, the artist, school or subject matter must already be famous. Sometimes nice paintings are just that—enjoyable paintings of no exceptional monetary or historical value.

Sentimental Value

Sentimental value is most familiar to the family historian. Many of us cherish “worthless” little trinkets for the memories they inspire. It isn’t uncommon for families to haggle over who gets the cookie jar after Grandma’s death. It’s not the thing, it’s the memories that go with it.

Tip: Having trouble letting go of papers from Grandma’s house? Separate items in a box and see if other family members want anything. If no one else finds value in the papers, you may feel easier about tossing them.

Denise Levenick blogs about organizing and preserving family archives at The Family Curator.

A version of this article appeared in the July/August 2012 issue of Family Tree Magazine .